pfSense firewall rules are the most important configuration on the platform — wrong rules expose your network, missing rules block legitimate traffic. In ~40 words: rules are evaluated top-to-bottom per interface, the first matching rule wins, and “deny by default” with explicit allow rules for what you actually need is the production approach. The default LAN allow-all rule is fine for getting started but should be tightened.
This tutorial walks through pfSense firewall rules from basic concepts through production-ready security. The same principles apply whether you’re protecting a home lab, small business, or family network. By the end you’ll have rules tight enough for production while still allowing the legitimate traffic your network needs.
How pfSense Firewall Rules Work
pfSense evaluates rules per interface, top-to-bottom, with first-match-wins logic. A packet arriving on the LAN interface is evaluated against LAN rules in order; the first rule that matches determines whether the packet passes or drops.
This means rule order matters. A “block all from 10.0.0.5” rule below a “allow all from LAN” rule never fires — the allow rule matches first. Production rules: specific deny rules at the top, specific allow rules in the middle, broad allow rule at the bottom (or no broad allow for tighter security).
The default LAN rule is “allow all from LAN net to any” — the rule that lets your devices reach the internet by default. For the broader pfSense configuration, see our complete pfSense configuration guide.
Anatomy of a Firewall Rule
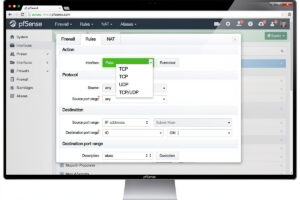
Each rule has these fields: action (pass/block/reject), interface (LAN, WAN, OPT1, etc.), TCP/UDP/any, source (IP or alias), source port, destination (IP or alias), destination port, and description.
Pass: the packet is allowed. Most rules pass. Block: the packet is silently dropped. Reject: the packet is dropped AND the sender is notified — slightly faster failure but reveals firewall existence to scanners.
Source and destination can be: any (matches anything), single host (specific IP), network (CIDR range), alias (named group), or this firewall (the pfSense LAN IP itself). Using aliases for groups simplifies rule maintenance — change the alias once, all rules using it update automatically.
Using Aliases for Maintainable Rules
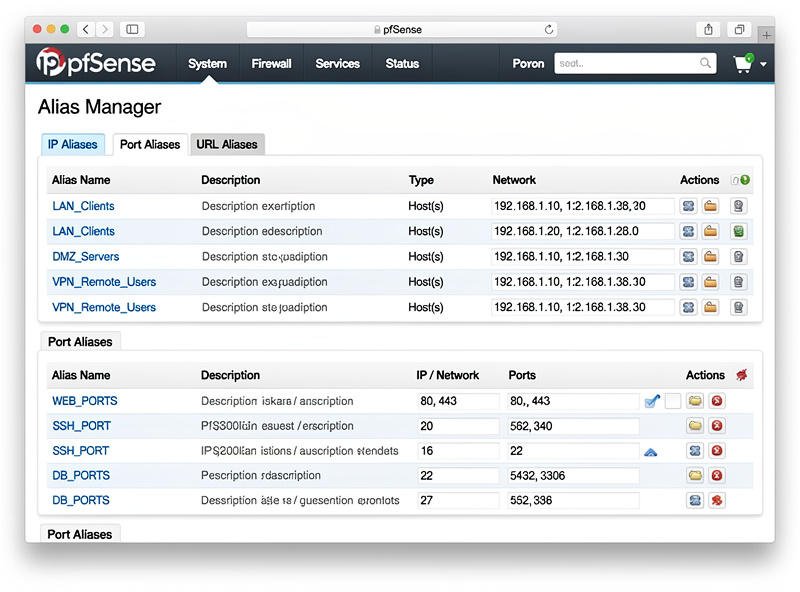
Aliases are the most powerful pfSense rule feature for production deployments. Configure: Firewall → Aliases → IP tab → Add. Create groups like “trusted_admins” (containing your admin laptop and phone IPs), “work_servers” (the IPs you SSH to regularly), or “iot_devices” (your smart home IPs).
Rules referencing aliases update automatically when the alias changes. Add a new admin laptop to your network? Update the “trusted_admins” alias and every rule using it gets the new IP automatically. Without aliases, you’d modify dozens of rules manually.
Common production aliases: trusted devices (admin/owner devices), IoT devices (smart home, requires isolated rules), services (specific port-forwarded services), and untrusted ranges (blocked geographic IP ranges or known bad actors).
Default-Deny vs Default-Allow
The biggest production decision: keep the default LAN allow-all rule, or remove it and add explicit allow rules for everything?
Default-allow (keep the rule): Everything works out of the box. New devices on LAN can immediately access the internet. Tighter rules above the allow-all block specific things. This is the appropriate setup for typical home networks where convenience matters.
Default-deny (remove allow-all): Nothing works without explicit allow rules. New devices need rules added before they can access anything. This is the appropriate setup for production small business networks where security matters more than convenience.
For most home networks: keep default-allow with specific block rules above (block IoT VLAN to LAN, block guest VLAN to private services). For small business or sensitive networks: switch to default-deny and explicitly allow what’s needed. Migrating between approaches takes a weekend of careful work.
VLAN Isolation Rules
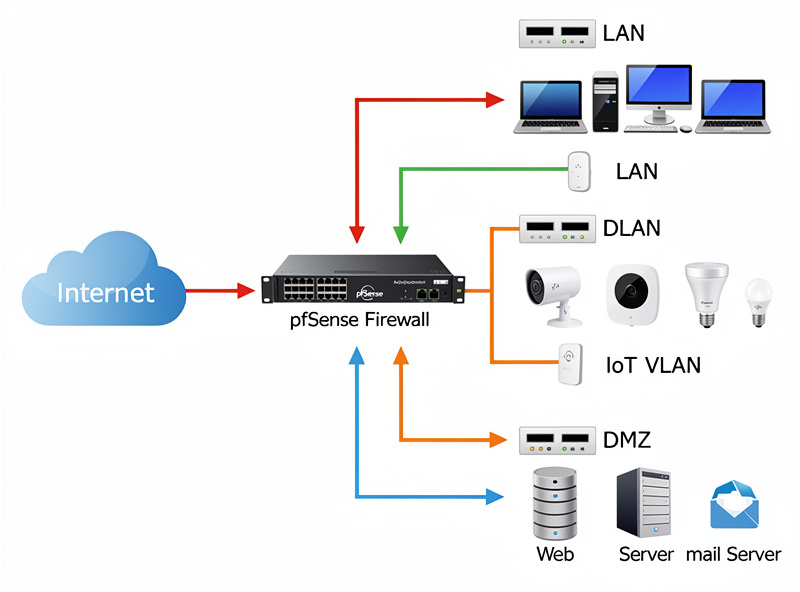
VLAN isolation is the most-used firewall rules pattern. Devices on the IoT VLAN should not reach devices on the main LAN; guest VLAN devices should not reach internal services; DMZ servers should not initiate connections inward.
Standard IoT VLAN rules (apply to the IoT interface): Block IoT to LAN net (prevents IoT devices from reaching your computers/NAS). Block IoT to private RFC1918 ranges (prevents IoT from reaching any internal subnet). Allow IoT to ANY (lets IoT reach internet for updates, cloud services).
Standard guest VLAN rules: Block guest to LAN net. Block guest to all RFC1918. Allow guest to specific allowed services if any (e.g., LAN print server access). Allow guest to ANY for internet.
The result: VLANs are properly isolated. An IoT smart bulb can’t talk to your computer; a guest’s phone can’t access your file shares. The rules take 15-30 minutes to set up correctly per VLAN. See our home network security hardening guide for the broader VLAN strategy.
Port Forwarding Rules
Port forwarding makes internal services accessible from the internet. Common uses: hosting a web server, accessing home automation remotely, or running a game server.
Configure via Firewall → NAT → Port Forward. Specify: external interface (typically WAN), external port (e.g., 443 for HTTPS), internal IP (the destination server), internal port (the service’s listening port). pfSense auto-creates the firewall rule allowing this traffic.
Production tip: never expose admin interfaces (web admin, SSH) to the internet directly. Use VPN access instead. Port-forward only public services (web, mail, game) and protect them with their own authentication. Our VPN guide covers WireGuard for remote access.
Time-Based Rules and Schedules
Schedules let rules apply only during certain hours — useful for parental controls, time-restricted access, or scheduled maintenance windows.
Create schedules: Firewall → Schedules → Add. Specify days (Mon-Fri) and time range (8am-5pm). Then in any firewall rule, reference the schedule from the schedule dropdown.
Common uses: block kids’ devices from reaching certain sites after 9pm, allow remote access only during business hours, or block streaming services during work hours. Useful for any network where time-of-day access policy matters.
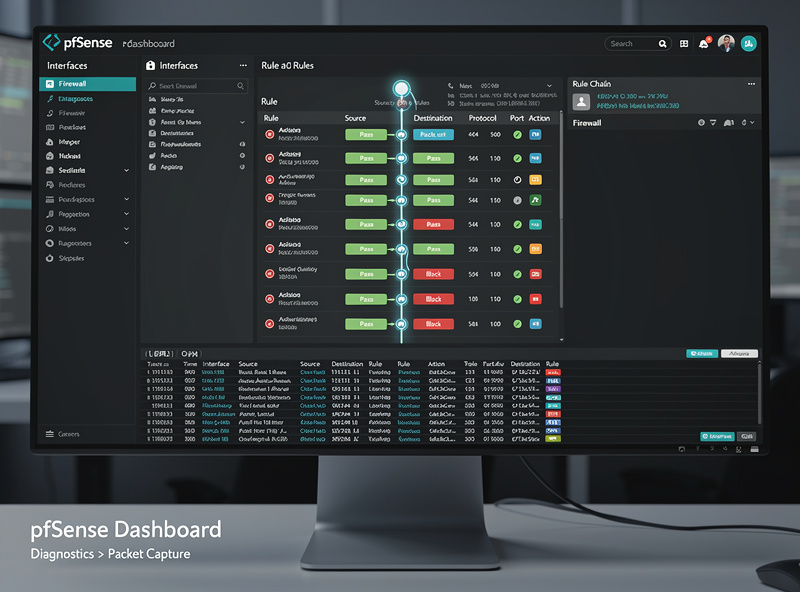
Logging and Rule Diagnostics
pfSense logs every blocked packet by default. View logs: Status → System Logs → Firewall. Each log entry shows the rule that matched, source/destination IPs, and ports.
For troubleshooting, the firewall log is invaluable. If a service isn’t working, check the log for blocked packets matching the source IP. If you see blocks where you expected passes, a rule is wrong.
For production, configure log rotation: System → Settings → System Logs → enable rotation and set the retention. Without rotation, the log file grows until disk is full — a real production issue on smaller pfSense boxes.
Frequently Asked Questions
Why do my pfSense rules not work?
Three common causes: rules are in wrong order (specific rules below the broad allow-all rule never fire), rule is on wrong interface (rule on LAN won’t filter WAN traffic), or you forgot to apply changes after editing (pfSense requires explicit Apply after rule changes). Always check the firewall log to see which rule actually matched.
What’s the difference between block and reject?
Block silently drops the packet — the sender’s connection times out. Reject drops the packet AND sends a TCP reset (or ICMP unreachable for UDP) — the sender immediately knows the connection failed. Reject is faster failure but reveals firewall presence to port scanners. Block is the more secure default for unsolicited traffic.
How many firewall rules can pfSense handle?
Practically unlimited for desktop CNC use. Production deployments routinely have hundreds of rules without performance issues. The hardware limit on a Topton N100 mini PC is roughly 10,000+ rules before performance degrades. Most home networks have 10-30 rules total — well within capacity.
Should I use default-deny or default-allow?
Default-allow with specific block rules for typical home networks (convenience-focused). Default-deny with explicit allow rules for small business or sensitive networks (security-focused). Most users start with default-allow and migrate to default-deny only if security needs justify the configuration overhead.
Why is my port forward not working?
Most common cause: NAT reflection isn’t enabled (when accessing from inside the network using the public IP, traffic doesn’t route correctly). Enable NAT reflection: System → Advanced → Firewall & NAT → enable NAT Reflection. Or test from outside the network — phone with cellular data hitting the public IP confirms the forward works.
Can pfSense block specific countries?
Yes via pfBlockerNG (free package). Configure GeoIP feeds — block traffic from specific countries entirely. Common production uses: blocking countries you have no business in (Russia, China, North Korea for many users) reduces firewall log noise and stops automated attacks. Setup takes 10-15 minutes plus GeoIP feed download.
Do I need to log every blocked packet?
No, and you usually shouldn’t. Default settings log most blocked traffic, which generates significant log volume. Disable logging on common-block rules (e.g., the catch-all block-all rule at the bottom): edit the rule, uncheck “Log packets that are handled by this rule.” Logs become useful again because they only contain interesting events.