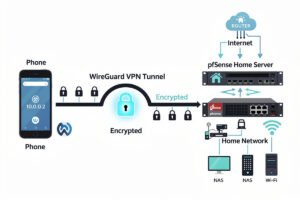
WireGuard on pfSense gives you remote access to your home network from anywhere — phones, laptops, tablets — using modern encryption that’s faster and simpler than OpenVPN. In ~40 words: install the WireGuard package, generate server keypairs, add peer keypairs (one per device), configure firewall rules to allow VPN traffic to LAN, scan QR codes from mobile clients, connect. Total setup time: 30-45 minutes for first peer.
This guide walks through complete WireGuard setup on pfSense from package install through verified remote access. WireGuard replaces older OpenVPN setups with a simpler, faster, more reliable VPN. By the end you’ll have remote access to your home network from any device, with modern, well-reviewed encryption that holds up against any commercial VPN.
Why WireGuard Instead of OpenVPN
WireGuard is a newer VPN protocol that’s simpler and faster than OpenVPN. The core differences: WireGuard uses ~4,000 lines of code (OpenVPN: 100,000+), modern crypto (Curve25519, ChaCha20), runs in the kernel for faster throughput, and uses a stateless protocol that reconnects almost instantly after network changes.
For desktop performance: on modern mini-PC hardware, WireGuard’s kernel-mode implementation routinely reaches the high hundreds of Mbps to near-gigabit, while OpenVPN’s userspace implementation tops out well below that on identical hardware — Netgate’s own lab benchmark measured 909 Mbps for kernel-mode WireGuard versus 329 Mbps for the userspace port on the same SOHO gateway. For mobile: WireGuard reconnects when switching between WiFi and cellular without dropping the tunnel; OpenVPN often drops the connection.
The trade-off: WireGuard has narrower client compatibility than OpenVPN. WireGuard clients exist for Windows, macOS, Linux, iOS, Android, but not for many embedded devices that have OpenVPN clients. For typical home use (phones, laptops, occasional tablets), WireGuard’s compatibility is fine.
For broader pfSense context, see our complete pfSense configuration guide.
Installing the WireGuard Package
WireGuard has been available on pfSense as an installable package since the 2.5.x line, with a more mature kernel module in pfSense’s official WireGuard documentation covering 2.7 and later — either way, the GUI requires installing the WireGuard package first. System → Package Manager → Available Packages → search “WireGuard” → install. Installation takes 1-2 minutes and includes the kernel module and web GUI.
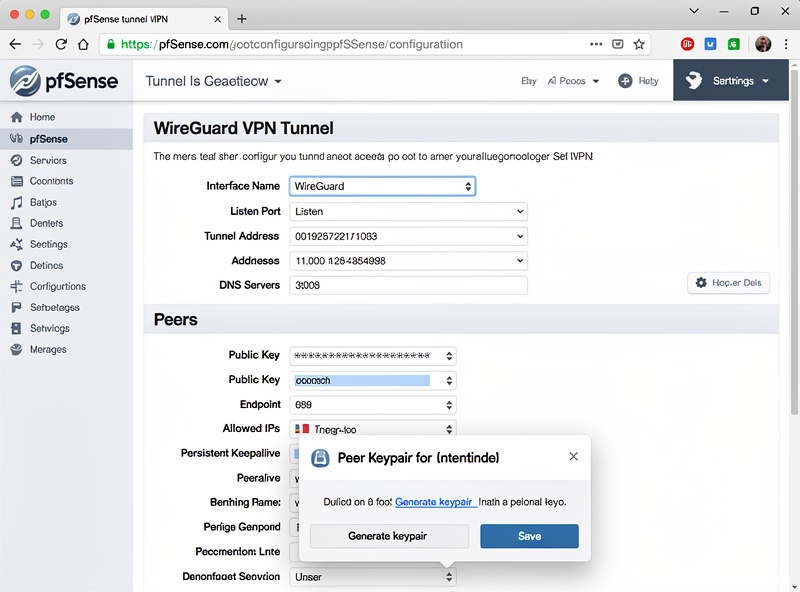
After install, navigate to VPN → WireGuard. You’ll see Tunnels and Peers tabs. The flow: create a Tunnel (the server side), then add Peers (each remote device).
Tunnel settings: enable, listen port (51820 is standard), interface address (a private subnet just for VPN — 10.10.10.1/24 is common), description. Click “Generate” next to the private/public key fields to create new server keys. Save.
Adding a Peer (Device)
Each remote device that connects gets its own peer entry. Configure: VPN → WireGuard → Peers tab → Add. Specify: tunnel (the tunnel from previous step), peer name (e.g., “Phone”), enable.
For the keypair, the cleanest approach is generating keys on the client and only entering the public key here. Some pfSense versions auto-generate a keypair you copy to the client; either approach works.
Allowed IPs: this is the IP the peer will use inside the tunnel. Pick a unique IP per peer (e.g., 10.10.10.2/32 for Phone, 10.10.10.3/32 for Laptop). The /32 mask matters — broader masks cause routing issues.
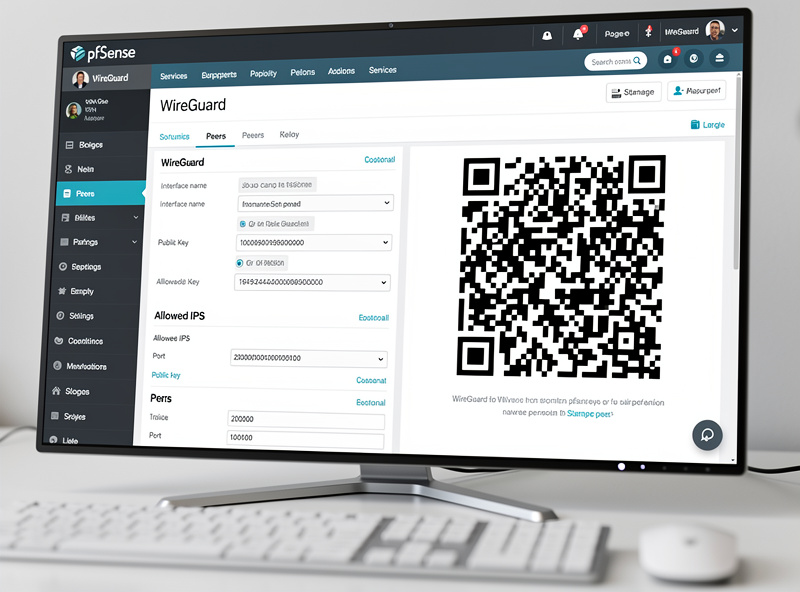
Save the peer. pfSense generates a configuration template you can give to the client. For mobile clients, the config can be displayed as a QR code that the WireGuard mobile app scans directly.
WireGuard Firewall Rules
WireGuard creates a new interface (the tunnel). Firewall rules on this interface control what VPN-connected devices can access. Without rules, peers connect but can’t reach anything.
Create the rule: Firewall → Rules → WireGuard tab → Add. Allow tunnel traffic to LAN: Action pass, Interface WireGuard, Source = WireGuard net (the 10.10.10.0/24 from your tunnel config), Destination = LAN net.
For full home network access (most home users): allow tunnel to ANY destination. This lets remote phones and laptops access everything on your home network like they’re physically connected.
For tighter access (production use): allow tunnel only to specific services (e.g., SSH on a specific server, HTTPS on a specific dashboard). This limits damage if a peer device is compromised. See our pfSense firewall rules tutorial for advanced rule patterns.
External Port Forwarding for WireGuard
WireGuard listens on UDP port 51820 by default. The traffic arrives at pfSense’s WAN interface — without a firewall rule, it’s blocked.
Allow incoming WireGuard traffic: Firewall → Rules → WAN tab → Add. Action pass, Protocol UDP, Source ANY, Destination = This Firewall (self), Destination port 51820.
This is the only rule needed for external access. WireGuard handles its own authentication via cryptographic keys; the firewall rule just lets the encrypted tunnel reach pfSense.
For users behind CGNAT (carrier-grade NAT, common with mobile internet and some ISPs), incoming WireGuard won’t reach you because the ISP doesn’t route public IP traffic to your home connection. Solution: use a VPS (cheap $5/month server) running WireGuard as a relay. The home WireGuard connects out to the VPS; remote clients connect to the VPS too. Works around CGNAT entirely.
Mobile Client Setup
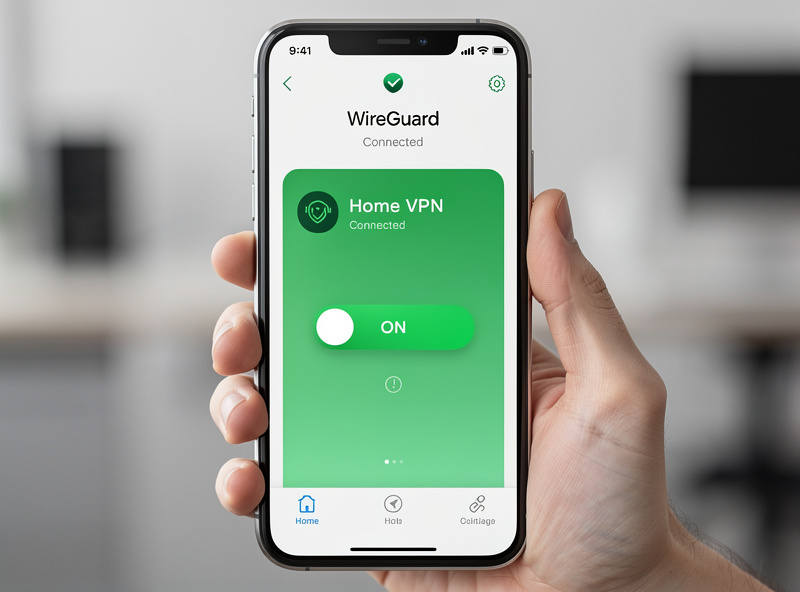
Install WireGuard from the App Store (iOS) or Play Store (Android). Open the app, tap “+”, select “Create from QR code.” Point camera at the QR displayed in pfSense’s peer config. The peer is now configured.
Tap the peer to connect. Status changes to “Active.” Test by browsing to your pfSense web interface URL — it should load. Test by accessing a service on your LAN (NAS, home automation dashboard) — it should work like you’re at home.
For laptops, install the WireGuard client from wireguard.com. Import the .conf file from pfSense (saved to disk via the peer config download). Connect.
The mobile experience is the killer feature. WireGuard reconnects automatically when switching between WiFi and cellular, sleeps efficiently when not transferring data (no battery drain), and reconnects in <1 second when the network comes back. OpenVPN cannot match this.
Split Tunnel vs Full Tunnel
By default, WireGuard sends ALL traffic through the tunnel (full tunnel). This includes web browsing, video streaming, app traffic — all through your home connection.
For typical remote access, split tunnel is preferred: only home network traffic goes through the tunnel; everything else uses the local internet. This saves home bandwidth and reduces latency for normal browsing.
Configure split tunnel in the peer config (client-side): change “AllowedIPs” from “0.0.0.0/0” (full tunnel) to your home network ranges only (e.g., “192.168.1.0/24, 10.0.0.0/24”). Now only traffic to those ranges goes through the VPN.
For users wanting all traffic encrypted (privacy use case, public WiFi protection), keep full tunnel. For users who only want home network access, switch to split tunnel.
Frequently Asked Questions
Is WireGuard really faster than OpenVPN?
Yes, measurably. On comparable mini-PC hardware, kernel-mode WireGuard reaches the high hundreds of Mbps to near-gigabit, while OpenVPN’s userspace implementation tops out well below that (Netgate’s own lab testing measured roughly 2.75x more throughput for kernel-mode WireGuard versus the userspace port). For home gigabit fiber users, the WireGuard speed advantage is significant.
Can I have multiple WireGuard tunnels?
Yes — pfSense supports many tunnels with separate keys, ports, and IP ranges. Common reasons: different peer groups (family vs admins), separate work and personal tunnels, or multiple WAN connections. Each tunnel is independent. The hardware load scales with peer count and traffic, not tunnel count.
Why won’t my WireGuard peer connect?
Most common cause: WAN firewall rule blocking inbound UDP 51820. Verify the rule exists. Second most common: CGNAT — your ISP doesn’t route public IP traffic to you. Test by trying to ping your public IP from outside; if it doesn’t respond, you’re behind CGNAT and need a VPS relay or different ISP setup.
Does WireGuard drain phone battery?
Less than OpenVPN. WireGuard’s stateless design means the connection sleeps when no data flows; OpenVPN keeps a TCP connection alive. Battery impact for typical use (occasional remote access, not continuous streaming) is negligible. Continuous use (always-on full tunnel) does increase battery use noticeably.
Can I host WireGuard on the same pfSense as my OpenVPN?
Yes — WireGuard and OpenVPN can run simultaneously on different ports. Useful when migrating from OpenVPN to WireGuard, or when supporting clients that need OpenVPN. Both protocols can route to the same LAN with the same firewall rules.
What if my home IP changes?
Use Dynamic DNS (DDNS). pfSense supports DuckDNS, No-IP, Cloudflare, and many other DDNS providers. Configure: Services → Dynamic DNS → add provider. WireGuard clients connect to your DDNS hostname (mynetwork.duckdns.org) instead of an IP, so changes don’t break the connection.
Should I use full tunnel or split tunnel?
Split tunnel for typical remote access (only home network traffic through VPN). Full tunnel when on untrusted networks (public WiFi, hotel WiFi) for privacy. Most home users default to split tunnel for performance and switch to full tunnel only when traveling on suspicious networks.
Related Articles
- Complete pfSense Configuration Guide
- pfSense Firewall Rules Tutorial
- VPN, DNS, and Privacy Self-Hosted Services
- Home Network Security Hardening
- Troubleshooting Your Home Network