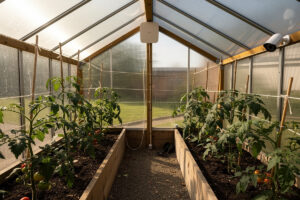
A greenhouse is one of the worst environments for consumer Wi-Fi gear: high humidity, condensation, sub-freezing winters in cold climates, and 90°F+ summer interior temperatures. The fix is a hardened access point in an IPX5-or-better enclosure on a 48V POE injector, plus an outdoor-rated network camera and dedicated DC power for the sensors. Total hardware spend runs 250-400 USD; once installed, the network operates reliably for 5+ years.
This guide covers AP placement, cable specification, sensor power, and the moisture-management tricks that keep electronics alive in a 90% relative humidity environment year-round. Target hardware is a Ubiquiti U6-Mesh, a Mikrotik Cap AC, or a TP-Link EAP610-Outdoor — anything IPX5 or higher rated for prolonged humidity exposure.
Why Indoor Wi-Fi Gear Fails in a Greenhouse
Standard indoor APs and IP cameras assume relative humidity below 80% and temperatures between 0°C and 40°C. A greenhouse routinely violates both. Condensation forms inside the device when humid air hits cold internal components in the morning, then evaporates as the day heats up — repeatedly. Within 6-18 months the device fails: corroded contacts, dead capacitors, or a stuck power supply that draws current but produces no Wi-Fi.
The second failure mode is heat. A south-facing greenhouse can hit 110-130°F at the ridgepole on a summer afternoon. Indoor APs throttle radio output around 50°C internal temperature and shut off entirely at 70°C. By 2 PM in July, your Wi-Fi has been dropping packets for hours. Outdoor-rated APs handle this; a U6-Mesh specs to 60°C ambient (Ubiquiti U6-Mesh tech specs) and continues running through the heat spike.
The third reason is electrical. Greenhouse irrigation systems, fans, and propane heaters generate enough RF noise and voltage spikes to cause unprotected gear to crash. POE injectors with surge protection plus a dedicated DC supply for sensors prevent this. The same logic applies to other prosumer environments — see the OPNsense firewall rules guide for the network-side hardening that complements the physical-layer approach in this article.
Access Point Placement
Place the AP at the south-facing peak of the greenhouse roof, 2-3 feet down from the ridge. This puts it above the plant canopy (which absorbs 2.4 GHz badly) and centers coverage across the whole footprint. For a 10×20 ft greenhouse, one U6-Mesh covers everything; for a 20×40 ft commercial structure, two APs at opposite ends with a Wi-Fi 6 mesh backhaul handle the entire space.
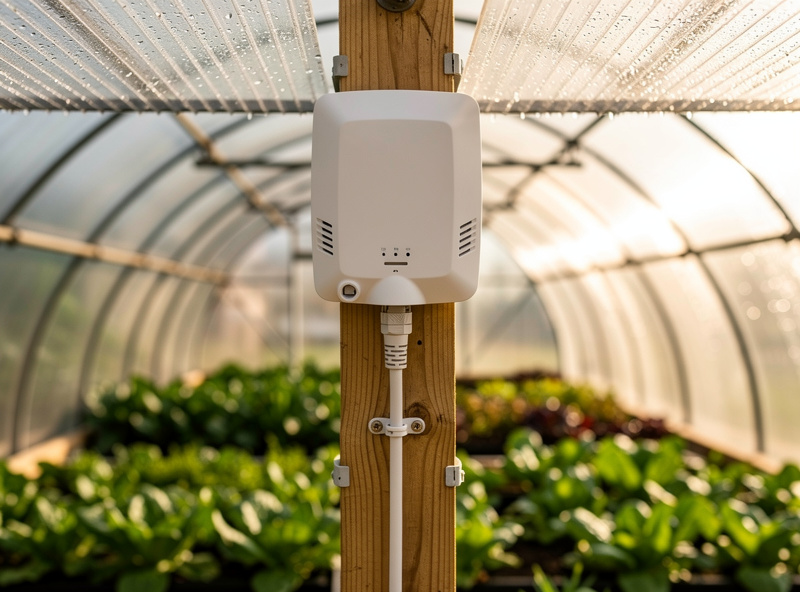
Avoid the temptation to mount the AP outside the greenhouse and rely on signal penetrating the glazing. Polycarbonate panels reflect 30-50% of 5 GHz signal; double-glazed glass is even worse. The Wi-Fi inside drops to roof-survey strength (-75dBm or worse) which means slow speeds and repeated re-association events that kill IoT sensors. Mount the AP inside the greenhouse on the dry side of the roof.
Cable run from the AP to the main building should be direct-burial CAT6 in conduit. Above-ground runs in the greenhouse degrade fast under UV and freeze-thaw cycling. The conduit also protects against rodent damage — mice love insulating cable jackets. The cable approach mirrors the rural network-build patterns covered in the homelab network builds guide.
POE and Power Distribution
Power the AP with the 48V POE injector its manufacturer specifies (Ubiquiti’s U6-Mesh ships with a dedicated 48V adapter) at the indoor end of the cable run, not at the AP. This keeps the most heat-sensitive component (the POE supply) inside the conditioned house and pushes only DC voltage out to the greenhouse. A surge protector between the cable and the AP catches lightning-induced spikes that travel down the run during summer storms.
For sensors and cameras inside the greenhouse, run a separate 12V or 24V DC bus from a small low-voltage transformer in the main house. Each sensor connects via a waterproof DC connector with strain relief. Avoid running 120V AC inside the greenhouse for IoT loads — every wet connection becomes a corrosion site, and the failure mode includes electrical shock risk in a watering environment.
| Component | Recommended Model | Power | IP Rating | Price (USD) |
|---|---|---|---|---|
| Outdoor AP | Ubiquiti U6-Mesh | PoE, 48V | IPX5 | 199 |
| Outdoor camera | Reolink RLC-820A | PoE (802.3af, 48V) | IP67 | 110 |
| POE switch | TP-Link TL-SG1005LP | AC input, 802.3af/at, 40W PoE budget | Indoor | 55 |
| Soil sensor | Ecowitt WH51 | Battery | IP66 | 20 |
| Surge protector | Ubiquiti ETH-SP-G2 | Pass-through | IPX5 | 20 |
Camera Coverage for the Reservoir and Plants
Place one IP67-rated camera at the diagonal opposite corner from the AP, pointing along the long axis of the greenhouse. This single camera covers the whole interior, sees the irrigation reservoir for water-level monitoring, and gives a remote-check view of the plants when you are at work. Avoid Wi-Fi cameras inside the greenhouse — humidity kills the antenna over 18 months. Use POE-wired cameras only.
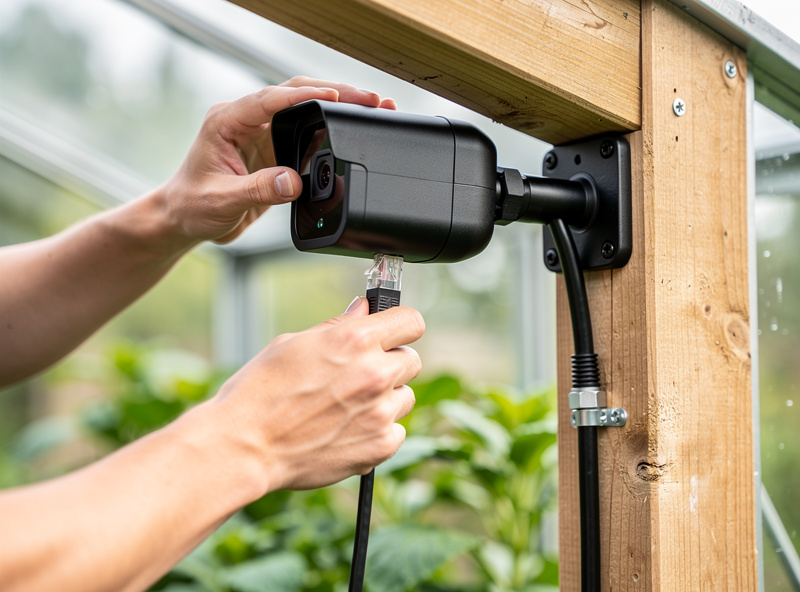
Position the camera so the morning sun does not point directly into the lens — south or southeast greenhouse layouts mean the camera works best at the southwest corner facing northeast. The IR illumination on the camera handles night-time monitoring without any extra lighting. For the firewall rules to keep the camera from phoning home, the same VLAN segmentation pattern works as in any IoT-rich environment.
Frigate or Reolink NVR running on a Raspberry Pi 5 inside the main house records the feed and triggers alerts on motion. The total NVR setup costs under 150 USD if you reuse a Pi; otherwise a Reolink-branded NVR is plug-and-play but cloud-locked. Local-only recording is the better long-term pick.
Sensor Topology: Soil, Air, Reservoir
The minimum sensor set for a productive greenhouse is one soil moisture sensor per bed (Ecowitt WH51, battery), one air temperature/humidity sensor at canopy height, and one water-level sensor on the irrigation reservoir. Optionally add a CO2 sensor for winter operation when ventilation is closed. All sensors should be Zigbee or LoRa, not Wi-Fi — battery life is the deciding factor.
Battery-powered sensors fail predictably in a greenhouse: the battery contacts corrode from humidity. Replace alkaline batteries with lithium primary cells (Energizer Ultimate Lithium); they tolerate humidity better and last 3-5x longer. Check the contacts every spring during the seasonal greenhouse refresh and dab a small amount of dielectric grease to prevent corrosion.
Moisture Management for Electronics
The two physical interventions that most extend electronics life are silica desiccant in any enclosure and breather membranes on cable glands. A cable gland with a Gore-Tex breather membrane lets pressure equalize without admitting water; without one, daily temperature cycling pumps moist air into the device housing through the cable opening.
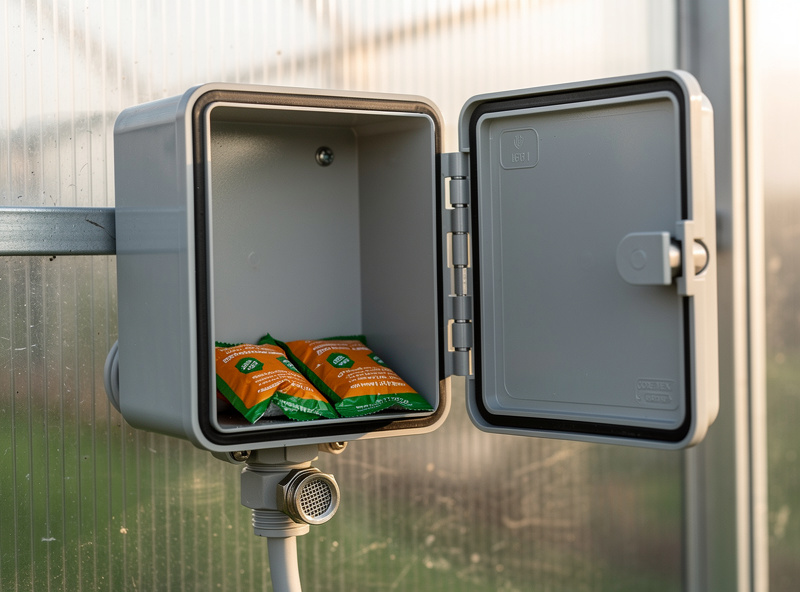
Replace silica desiccant once per season. The 50g packs from electronics suppliers handle a single AP enclosure for 3-4 months before saturating. Color-changing desiccant (orange-to-green) makes the swap obvious. Do not skip this step — saturated desiccant accelerates corrosion rather than preventing it because it traps moisture against device surfaces.
For the broader picture of how the greenhouse network ties to the rest of the homestead, including the irrigation control loop and the dashboard for remote monitoring, the raised beds and planters complete guide covers the bed layouts and sensor placements that benefit from this network setup.
Frequently Asked Questions
Will Wi-Fi work in a greenhouse?
Yes, with outdoor-rated equipment. An IPX5-rated access point like the Ubiquiti U6-Mesh mounted at the greenhouse roof peak handles humidity, temperature swings, and condensation that destroy indoor APs within 12-18 months. Plan on 250-400 USD for a hardened setup.
Can I use an indoor Wi-Fi router in a greenhouse?
No. Indoor routers fail within 6-18 months due to condensation, humidity, and 110-degree-Fahrenheit summer interior temperatures. The failure mode is corroded contacts and dead capacitors. Outdoor-rated APs are required for any greenhouse network.
How do I run network cable to a greenhouse?
Direct-burial CAT6 in conduit between the main house and the greenhouse is the standard. Above-ground runs degrade fast under UV and freeze-thaw cycling. Use a surge protector at the greenhouse end to catch lightning-induced spikes during summer storms.
What sensors should I install in a greenhouse?
Minimum is one soil moisture sensor per bed, one air temperature and humidity sensor at canopy height, and one water-level sensor on the irrigation reservoir. Use Zigbee or LoRa sensors, not Wi-Fi, because battery life on Wi-Fi sensors is too short for unattended operation.
How do I keep electronics dry in a greenhouse?
Use IPX5-or-better rated enclosures with cable glands that include Gore-Tex breather membranes. Add silica desiccant packs inside enclosures and replace them seasonally. Do not skip this step because saturated desiccant accelerates corrosion rather than preventing it.
Does Wi-Fi penetrate greenhouse glass?
Polycarbonate panels reflect 30-50 percent of 5 GHz signal; double-glazed glass is worse. Mounting the AP outside and relying on signal penetration produces -75dBm interior signal at best. The reliable answer is to mount the AP inside the greenhouse on the dry side of the roof.
Related Articles
- OPNsense Firewall Rules Tutorial
- 5 Homelab Network Builds: Basic to Full Stack
- Wi-Fi 6 for Smart Homes: Why Mesh Networks Beat Boosters
- Raised Beds and Planters: Complete Guide
- Growing Vegetables on Your Balcony