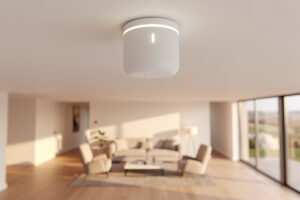
Good Wi-Fi coverage comes from fewer access points on the ceiling at moderate power, not more APs on the walls at maximum power. Mount them centrally in the area they serve, overlap their cells by a sliver, and dial transmit power down so clients roam cleanly instead of clinging. That single discipline fixes more coverage problems than any hardware upgrade.
Placement is the cheapest performance upgrade in home networking and the one almost everyone gets wrong. This is how I position APs in my own house and how I’d plan a layout from a floor plan, including a free way to verify coverage before you commit to drilling. It builds on the wired layout in the home Wi-Fi setup guide.
Mount on the Ceiling, Centered
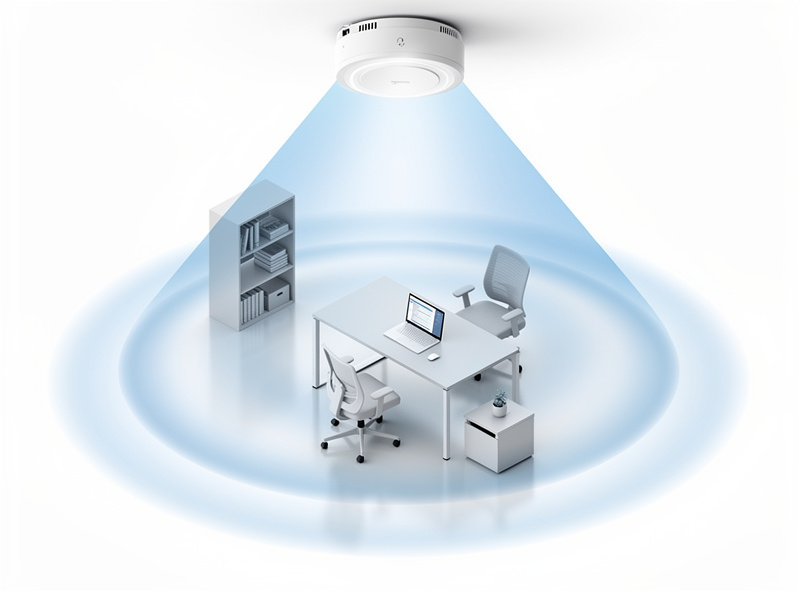
Access points belong on the ceiling in the middle of the area they cover, because a ceiling AP radiates a roughly circular cell downward and outward in every direction. A wall-mounted AP throws half its signal into the wall behind it and out of the house, wasting coverage and creating an uneven cell.
Indoor APs are designed to be ceiling-mounted — their antenna patterns assume signal spreading down and around from above. Put one on a wall and you get a lopsided cell: strong on the room-facing side, wasted on the wall side, and weak directly above and below. Central placement matters because signal falls off with distance and through walls; an AP in the corner of the house has to reach the far corner through every interior wall in between. I aim for one AP roughly central to each floor or zone, raised, unobstructed. The exception is genuinely outdoor or wet areas, which need a different mounting and ingress-rated approach — I cover the sauna and cold-plunge case separately in Wi-Fi in a wet room.
How Many Access Points You Need
Most homes need one AP per floor, or roughly one per 1,500 square feet of usable space, with more added only for unusual layouts or dense walls. Two well-placed APs cover a typical two-story home; a sprawling single-story or a house full of brick interior walls may need a third.
The instinct to “add more APs for better coverage” backfires past a point. Each AP you add at high power creates more co-channel interference with its neighbors, and clients start making bad roaming decisions because two APs both look strong. I’d rather run two APs at medium power with a clean overlap than four at high power fighting each other. Count walls, not just square footage — a 1,200 sq ft open-plan flat might need one AP, while a 1,200 sq ft house chopped into small rooms with old lath-and-plaster walls might need two. When in doubt, start with fewer and add one only where a survey shows a genuine gap, which is exactly the troubleshooting path in fixing Wi-Fi dead zones.
Transmit Power and Cell Overlap
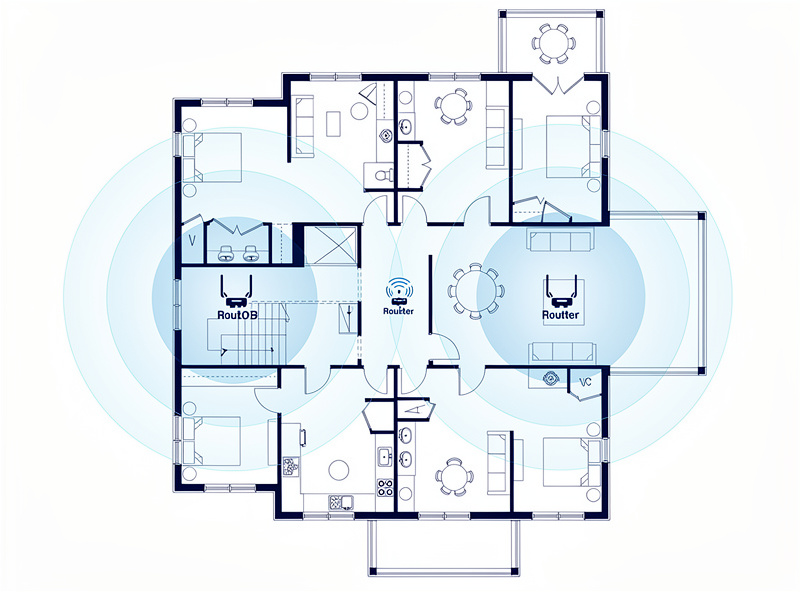
Set transmit power so neighboring APs’ cells overlap by roughly 15–20% — enough that a client always has a strong AP nearby, but not so much that it clings to a distant one. Lower power produces cleaner roaming than maximum power, which is the single most common placement mistake.
Maximum transmit power feels like it should extend range, and it does — in one direction. The AP shouts loudly enough that a phone hears it from across the house and shows full bars, but the phone’s tiny antenna can’t shout back at that distance, so the link looks strong and barely passes data. Worse, the phone won’t roam to a closer AP because the distant one still reads as “strong.” Turning power down shrinks each cell to a size the client can actually talk back across, and the modest overlap lets a walking client hand off before it loses signal. I drop 2.4 GHz especially low because it travels far and just creates interference at high power. This is the same power discipline I apply during UniFi access point setup.
Account for Walls, Floors, and Interference
What sits between the AP and the client matters as much as distance. Brick, concrete, tile, mirrors, and large appliances absorb or reflect Wi-Fi heavily, while drywall and wood barely slow it — so a placement that looks central on a floor plan can still leave a dead spot behind a masonry chimney or a stainless fridge.
I plan placement around the worst obstacles, not the open spaces. A multi-story home is the common case: signal passing through a floor goes through the floor structure plus whatever’s on it, so an AP directly below a target room often beats one two rooms away on the same level. Wet rooms with tile and metal, kitchens packed with appliances, and walls hiding ductwork or foil-backed insulation are the usual culprits behind a stubborn dead spot. The fix is rarely more power — it’s moving the AP to a spot with a cleaner line to the dead area, or accepting that a separate AP needs to serve the far zone directly. Interference is the other half: a neighbor’s AP, a microwave, or a cordless phone can hammer 2.4 GHz specifically, which is one more reason I push capable devices onto 5 and 6 GHz and keep 2.4 GHz for the IoT gear that has no choice. Mapping all of this is exactly what the survey step below is for.
Survey Before You Commit
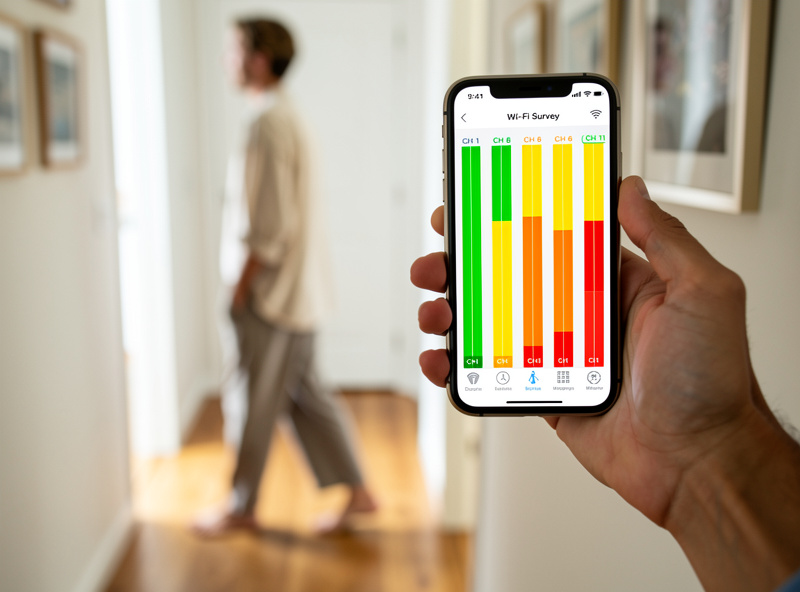
Before mounting APs permanently, run a quick Wi-Fi survey with a free phone app to map signal strength room by room. Walk the floor plan, watch the signal numbers, and find the dead spots — it takes ten minutes and saves you from drilling in the wrong place.
You don’t need professional heatmapping software for a home. A free Wi-Fi analyzer app on a phone shows you signal strength (in dBm) and which channels are congested as you walk around. I temporarily power an AP at a candidate spot — even just resting it there on its PoE cable — walk the rooms it should cover, and note where signal drops below usable. That tells me whether the placement works before I commit to a permanent mount and cable run. The same survey reveals channel congestion from neighbors, which tells me whether to pin 2.4 GHz to channel 1, 6, or 11 by hand. Survey, adjust, then mount — in that order. If your survey shows a stubborn gap no single AP reaches, that’s the signal to add an AP rather than crank power, and the diagnostic flow continues in fixing Wi-Fi dead zones.
For the gear, a ceiling-mount PoE AP like a ceiling-mount PoE access point plus a long Cat6 patch cable for the temporary survey run is all you need to test a spot before committing.
Frequently Asked Questions
Where should I place a home access point?
On the ceiling, centered in the area it serves, raised and unobstructed. A ceiling AP radiates a circular cell downward and outward, while a wall-mounted one throws half its signal into the wall behind it and out of the house.
How many access points does my house need?
Most homes need one AP per floor or roughly one per 1,500 square feet. A typical two-story home is covered by two well-placed APs. Count interior walls, not just floor area — dense walls may require one more.
Should I set transmit power to maximum for better range?
No. Maximum power makes the AP audible across the house but clients cannot reply at that distance, creating strong-looking but slow links and poor roaming. Lower power with cells overlapping about 15 to 20 percent gives cleaner handoffs.
Do I need software to survey Wi-Fi coverage?
Not for a home. A free Wi-Fi analyzer app on a phone shows signal strength in dBm and channel congestion as you walk the floor plan. Test an AP position before mounting it permanently to confirm the spot works.
Why do more access points sometimes make Wi-Fi worse?
Too many APs at high power create co-channel interference and confuse client roaming, since multiple APs all read as strong. Fewer APs at moderate power with clean overlap usually outperform a crowd of high-power units fighting each other.