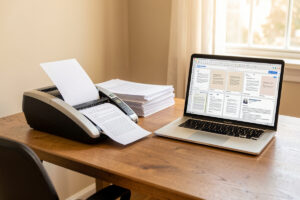
Paperless-ngx is a self-hosted document archive that watches a folder, runs optical character recognition on everything that lands in it, tags and indexes it, and gives you a search box over years of receipts, invoices, and tax documents. It turns a shoebox of paper into a queryable library, idles around 1.5 GB of RAM, and is the one app in my stack the non-technical people in the house actually use unprompted.
The reason a document archive is worth self-hosting is that paper is the slowest disaster in a household — it does not crash, it accumulates. A decade of utility bills, appliance manuals, medical EOBs, and tax supporting documents becomes a pile you can never search and a fire hazard you cannot replace. Paperless-ngx solves the search problem (every scanned page is full-text indexed) and, paired with a scanner and a shred habit, solves the pile problem too. Once a document is scanned and OCR’d, the paper goes to the shredder and the searchable copy lives on your own hardware.
I run Paperless-ngx on the Proxmox host as part of the stack in the self-hosted personal cloud apps guide, and it is the app that most repays a thoughtful workflow. This is the setup that turns scanning into a habit rather than a chore — the consume folder pattern, the OCR and language tuning, the document classification, and the storage and backup decisions that keep a decade of paper both searchable and safe.
What Does Paperless-ngx Actually Do With Your Documents?
Paperless-ngx ingests a document, runs OCR across it to extract the full text, applies tags and a document type, stores the original alongside the extracted text, and indexes everything for search. The result is that you can type “plumber 2023” into a search box and get the invoice from two years ago in under a second, with the original PDF rendered right there.
The pipeline is what makes it more than a file dump. When a document lands in the consume folder, Paperless picks it up, runs Tesseract OCR to extract text, optionally runs Apache Tika to extract text from office formats like DOCX and XLSX, classifies the document into a type (receipt, invoice, contract, bank statement), assigns correspondents and tags based on rules or machine learning, and files it in the archive. The original file is preserved unchanged; the extracted text and metadata sit alongside it in the database. Full-text search queries the index, and the web UI renders the original with your highlights on the matching text.
What separates this from a folder full of PDFs is the metadata layer. A folder gives you filenames; Paperless gives you correspondents (who sent it), document types (what it is), tags (whatever you want), and the full text of every page. That metadata is what makes a library of thousands of documents actually navigable, and it is what makes Paperless the front door for every piece of paper that enters the house.
The Consume Folder Workflow That Made It Stick
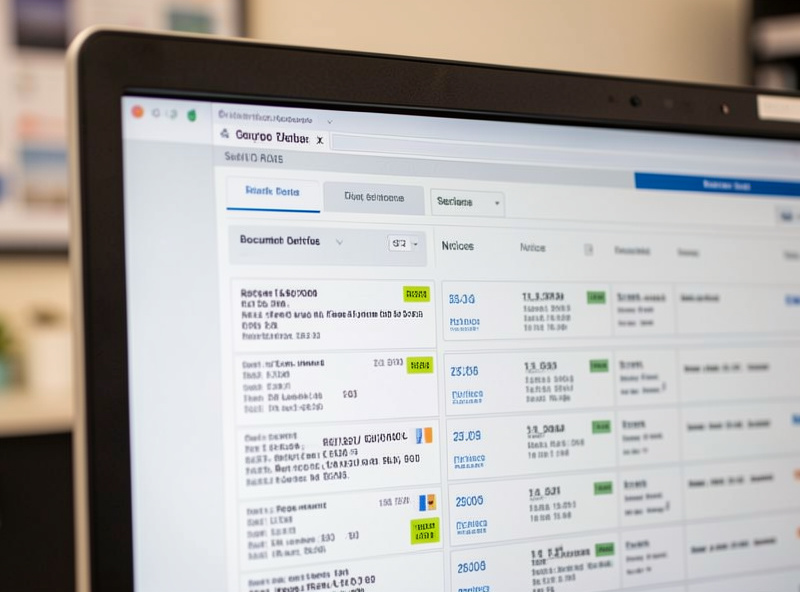
The pattern that turned Paperless from a hobby project into a daily habit in my house is a consume folder on the NAS: the scanner drops PDFs into it, and Paperless picks them up, OCRs them, classifies them, and files them with no further intervention. The friction has to be zero, or the paper piles up anyway.
My scanner is configured to save every scanned page as a PDF directly to a consume share on the NAS, over the network, with no PC in the loop. Paperless-ngx polls that folder on a short interval, and anything new gets ingested automatically. From the scanner’s perspective, it is just saving a file to a network share; from Paperless’s perspective, it is a queue of documents to process. The human action is “feed the scanner” and nothing else — classification and filing happen on their own. That zero-friction loop is the difference between a document archive that stays current and one that gets abandoned by February.
The configuration detail that matters is the polling interval and the consume folder’s location. I keep the consume folder on the NAS rather than inside the container so the scanner can reach it without knowing about Paperless, and Paperless mounts it read-write over the LAB-to-storage firewall path. The NAS as a home server guide covers the storage share setup. A short poll interval (a minute or two) keeps the loop feeling instant, which matters for adoption — if a scanned receipt does not appear in the archive within a minute, people stop trusting the system and start saving duplicates.
How Heavy Is Paperless-ngx on Hardware?
Paperless-ngx is a medium-weight app — it idles around 1.5 GB of RAM with Redis, a database, and the web server, and it spikes a CPU core during OCR. The load is bursty: quiet and cheap when idle, momentarily busy when a stack of documents lands in the consume folder, then quiet again. That burstiness is the thing to plan for, because a bulk scan will pin the OCR worker for a while.
The components are a Django web application, a PostgreSQL or MariaDB database for metadata, a Redis broker for the task queue, the Tesseract OCR engine, and optionally Apache Tika for office-document text extraction. In my deployment it runs in an LXC on the Proxmox host with the database on SSD, and a quiet instance is invisible in the resource graphs. The only time it makes itself known is during a bulk ingest — feeding fifty pages through the scanner produces a sustained OCR pass that runs for a few minutes and then subsides. The monitoring stack shows it as a clean spike, not a sustained load.
GPU acceleration is not really a factor here, unlike the Immich machine-learning container. Tesseract is CPU-based OCR, and it is fast enough on a modern CPU that a GPU would not change the daily experience. Where you feel hardware is in the storage speed of the database — a slow disk makes the search index laggy, so the database goes on SSD and the document originals can go on the NAS.
OCR and Multiple Languages: Making Scans Searchable
OCR is the feature that turns a scan into a searchable document, and Tesseract is the engine Paperless uses; the lever that determines OCR quality is which language packs you install, because a document scanned in Swedish will not OCR correctly against an English-only language model. Get the languages right and the search works; get them wrong and the extracted text is garbage that nothing matches.
Tesseract supports over a hundred languages, and you install the packs for the languages your documents actually use. My household has documents in English and Swedish, so I install both and configure Paperless to attempt both during OCR — the engine tries the configured languages and produces the best text it can. For multilingual households this is non-negotiable; a single-language install will quietly produce poor text for anything in the other language, and you will not notice until a search fails. The official documentation at paperless-ngx.com covers the language configuration in detail.
OCR quality also depends on scan resolution. A 300 DPI scan OCRs cleanly; a 150 DPI phone photo of a crumpled receipt OCRs poorly, and no software fixes that. The lesson is to scan at a real scanner’s resolution rather than photographing documents, and to let Paperless do the indexing rather than expecting it to rescue bad captures. The Tesseract project at github.com/tesseract-ocr/tesseract documents the engine’s capabilities and limits.
Document Classification: How It Learns Your Tags
Paperless-ngx can classify documents automatically using a machine-learning model that learns from the documents you have already tagged, so after a few dozen examples it starts assigning correspondents, document types, and tags on its own. The model improves as you correct it, which means the system gets faster to use the longer you run it.
The classifier looks at the full text of each document and the metadata you have assigned to similar documents, then proposes a classification for new ingest. Early on, when the archive is small, it guesses poorly and you correct it; as the archive grows to a few hundred documents, the guesses get good enough that most incoming documents are filed correctly without intervention. You can also fall back to explicit rules — “if the correspondent is the power company, tag it utility and type invoice” — for the cases where you want determinism rather than a learned guess.
The mistake I made with classification was over-training the model on a narrow set and then trusting it on documents it had never seen the pattern for. A model trained on a hundred invoices filed everything invoice-shaped as an invoice, including a few contracts that happened to mention an amount. The lesson is to use rules for the things you want guaranteed and the model for the things you want suggested, and to spot-check the classifier’s output rather than treating it as ground truth. A document archive you cannot trust is worse than one you have to file by hand.
Where Should the Document Store Live?
The document originals and the database should be on storage you trust and back up, because a document archive is the dataset you reach for at the worst moments — a tax audit, an insurance claim, a warranty dispute. Treat it as irreplaceable: originals on the NAS with snapshots, database on SSD, and an offsite replica of both.
In my deployment, the Paperless media directory (the original documents) is on the NAS over a dedicated storage path, and the PostgreSQL database is on local SSD for fast search. The NAS dataset snapshots hourly, which means an accidental deletion or a misclassification I want to undo is a rollback away. The whole archive — originals plus a database dump — replicates offsite, because the whole point of scanning and shredding the paper is that the digital copy is now the only copy. If you shred the paper and then lose the digital, you have nothing.
One decision worth getting right up front is whether Paperless is your store or your index. Paperless ingests documents and moves them into its own archive by default, which is convenient but means the original is now inside the app. I keep a parallel archive of the raw scans on the NAS outside Paperless, so that a Paperless rebuild or migration never risks the originals — Paperless is the index and the search, and the NAS is the store of record. That separation cost me a lesson: I once let Paperless ingest-and-move the only copy of some tax documents, then lost them during a container rebuild because I had not archived them separately. Now the originals exist in two places before Paperless ever touches them.
Reaching Paperless From Outside and Sharing Documents
Paperless is useful from a phone — photograph a receipt on the road and have it in the archive before you get home — which means you want to reach it securely from outside the house. The right way is WireGuard, with Paperless behind a reverse proxy using a real certificate, exactly like the rest of the stack.
In my setup, Paperless sits behind Caddy on the LAB segment with a Let’s Encrypt certificate, and it is reachable over WireGuard so a phone on cellular can drop a PDF into the consume folder or search the archive. The home VPN and remote access guide and the reverse proxy comparison cover the substrate. Paperless also supports sharing a document by link for the cases where you need to send a document to someone outside the tunnel — an insurance agent, an accountant — and that link is scoped to the single document rather than the whole archive.
The exposure rule is the same as for every personal-cloud app: do not forward a port to the open internet. A document archive containing tax documents and medical EOBs is a high-value target, and the convenience of a public URL is not worth advertising it to scanners. WireGuard gives you the same reachability with no attack surface, and the share-link feature handles the legitimate need to send a single document to a third party.
What I’d Do Starting Today
If I were standing up Paperless-ngx fresh, I would run it in an LXC on the Proxmox host with PostgreSQL on SSD and the media directory on the NAS, point the scanner at a consume folder on the NAS over the network, install the OCR language packs for every language in the household, and train the classifier on a few dozen documents before trusting it. I would keep a parallel archive of raw scans outside Paperless so the app is the index, not the only store, and I would snapshot and replicate the whole thing offsite.
The discipline that makes a document archive valuable is the workflow, not the software. Zero-friction scanning through a consume folder is what keeps it current; correct OCR languages are what keeps it searchable; a parallel store is what keeps it safe. Get those three things right and a decade of paper becomes a search box on your own hardware — queryable, backed up, and yours in a way a filing cabinet never was.
Does Paperless-ngx need an internet connection?
No. Paperless-ngx runs entirely on your own hardware and needs no internet connection to OCR, classify, or search documents. Reach it over WireGuard from outside the house rather than exposing it on a public port.
What OCR engine does Paperless-ngx use?
Paperless-ngx uses Tesseract for optical character recognition, with optional Apache Tika for extracting text from office formats like DOCX and XLSX. You install the Tesseract language packs for every language your documents use, or OCR quality drops sharply for non-matching languages.
Can Paperless-ngx automatically tag and sort documents?
Yes. A machine-learning classifier learns from documents you have already tagged and proposes correspondents, document types, and tags for new ones. You can also set explicit rules for cases where you want guaranteed sorting rather than a learned guess.
How do I get paper documents into Paperless-ngx?
Scan documents to PDF into a watched consume folder, ideally on a network share the scanner can reach directly. Paperless polls the folder, picks up new files, and runs OCR and classification automatically with no further action from you.
Is my document archive safe if I shred the paper?
Only if you back it up. Once you shred the paper, the digital copy is the only copy, so the originals and database should be snapshotted and replicated offsite. Keep a parallel archive of raw scans outside Paperless so a rebuild never risks the originals.
Read Next
- Self-Hosted Personal Cloud Apps: The Complete Guide
- NAS as a Home Server: Turning Storage Into a Service Host
- Vaultwarden: Running Your Own Bitwarden-Compatible Vault
- Immich: Self-Hosting a Google Photos Replacement
- Self-Hosted Read-It-Later Bookmarks: Linkding vs Wallabag