A home VPN is really three different jobs wearing one name: getting yourself back into your network from the outside, joining two sites together, and deciding which devices are allowed to talk once they are connected. In my setup the answer is a self-hosted WireGuard tunnel terminating on OPNsense, dropped into a default-deny firewall that treats a remote phone exactly like an untrusted IoT bulb until a rule says otherwise. Get that mental model right and every other decision on this page falls into place.
I have run remote access into the same segmented network for years now — the Proxmox host that is the spine of the rack, the hydro lab sensors, the kids’ consoles, the workshop bench, and a guest SSID are all different trust zones, and the VPN has to respect those zones instead of dumping a phone straight onto the trusted LAN. That is the part the influencer videos skip. This guide is the map: what each VPN type actually does, where the server should live, how to get in when your ISP hands you CGNAT, and how to keep a remote client from becoming the hole in an otherwise tidy network.
The three jobs a home VPN actually does
Before you pick software, name the job. Remote access (road-warrior) lets one device — your laptop in a cafe, your phone abroad — reach services at home. Site-to-site joins two whole networks, like your house and a parent’s flat, so subnets route to each other transparently. And a privacy/exit VPN sends your traffic out through a provider so the local network can’t see it. These are not interchangeable, and most home confusion comes from conflating the first with the third.
This cluster is about the first two — running your own server so you hold the keys — not about buying a commercial exit VPN. If your goal is hiding torrent traffic from your ISP, that is a different product entirely. If your goal is reaching your home NAS, your Proxmox dashboard, or your cameras from anywhere without exposing them to the open internet, you are in the right place. The deep dive on the road-warrior case lives in my remote access to your home network guide.
Why the ISP router is the wrong place to start
Most ISP gateways will happily offer a one-click VPN, and I would still not use it. The state table is tiny, the firmware reaches end-of-life while the box is still in service, the DNS handling is weak, and crucially there is no real segmentation — a connected client lands on the flat home LAN with everything else. The moment you care enough to read a 4,000-word VPN guide, you have outgrown that box. My beginner’s guide to what a router actually does covers why.
The bigger problem is reachability. A growing share of home connections sit behind CGNAT (carrier-grade NAT), where your “public” IP is shared and you cannot forward a port at all. Even without CGNAT, double-NAT from an ISP box in front of your own firewall breaks inbound tunnels in confusing ways. I diagnose those two conditions first on every remote-access build, because they decide whether you can self-host a listener at all or whether you need an overlay that dials out. More on that in the CGNAT section below.
Pick the right tool: the home VPN options compared
There is no single best VPN for every home — there is a best fit for your reachability, your trust model, and how much you want to operate. Here is how I weigh the five approaches I actually run or have run side by side. WireGuard on the firewall is my default; an overlay like Tailscale is what I reach for when CGNAT takes port-forwarding off the table.
| Approach | Setup effort | Works behind CGNAT | Trust model | Best for |
|---|---|---|---|---|
| WireGuard on OPNsense/pfSense | Medium | No (needs a port) | You hold every key | Road-warrior access, full control |
| OpenVPN (self-hosted) | High | No (needs a port) | You hold every key | Restrictive networks, TCP/443 fallback |
| Tailscale (hosted control) | Low | Yes | Keys local, coordination hosted | Fast setup, NAT/CGNAT traversal |
| Headscale (self-hosted control) | High | Yes | You hold everything | Tailscale features, zero third party |
| Site-to-site (WireGuard tunnel) | Medium | One side needs a port | You hold every key | Joining two homes/labs permanently |
The two head-to-heads worth reading before you commit: WireGuard vs OpenVPN for home use for the protocol choice, and the Tailscale and Headscale setup guide if an overlay is the better fit. If you want the firewall-native, click-by-click build I run, my OPNsense WireGuard tutorial and the pfSense WireGuard setup walk the actual configuration.
Where the VPN server should live
There are two sane homes for a self-hosted VPN listener: on the firewall, or on a host behind it. I terminate WireGuard on OPNsense itself, because the firewall is already the edge device, already holds the public-facing interface, and already enforces the inter-VLAN rules I want the tunnel to obey. The remote peer becomes just another interface the firewall can write rules against — which is exactly the control you want.
The alternative is running the VPN in a container or VM on the Proxmox host — a WireGuard LXC, or a Tailscale subnet router. That is the right move when your edge device can’t run the software, when you want the overlay’s NAT traversal, or when you are isolating the VPN into its own blast radius. I run an overlay node on the host precisely so that if the coordination layer ever misbehaves, it is caged in an LXC and not sitting on my firewall. The LXC vs VM tradeoff applies here like anywhere else.

Routing: full tunnel, split tunnel, and per-device policy
Once a peer connects, you decide what goes through the tunnel. A full tunnel pushes all of the client’s traffic home — safest on hostile Wi-Fi, but it routes your streaming through your house too. A split tunnel sends only home-network subnets over the VPN and lets everything else go out the local connection — faster and lighter, but the local network can see the rest of your traffic. I run split tunnels for trusted personal devices and full tunnels for anything touching sensitive services on networks I do not trust.
The nuance most guides miss is that this is a per-device decision, not a global switch. My phone, my work laptop, and a family member’s tablet each get a different allowed-IPs scope and a different firewall policy on arrival. That is the whole point of terminating on the firewall: a remote peer is an interface I can rule against. The mechanics live in the split tunneling guide and the per-device VPN policy guide.
Joining two locations: site-to-site
Road-warrior access is one device dialing in. Site-to-site is two networks permanently stitched together so a NAS at location A backs up to a box at location B without anyone clicking connect. I run a WireGuard site-to-site tunnel as a persistent peer with both subnets in allowed-IPs and a static route on each firewall — offsite backups ride over it on a schedule. The catch is routing discipline: overlapping subnets on both ends is the classic mistake that makes the tunnel come up and route nothing. Use distinct ranges (for example 10.10.0.0/24 here, 10.20.0.0/24 there). The full build is in the site-to-site VPN for a home lab guide.
Mesh VPN: when point-to-point stops scaling
A traditional VPN is hub-and-spoke — every client talks through one server. A mesh VPN lets nodes form direct encrypted links to each other, so the laptop at a cafe talks straight to the NAS at home rather than bouncing through a central concentrator. WireGuard can be meshed by hand, but the configuration grows as the square of the node count and becomes miserable past a handful of peers. This is exactly the problem Tailscale and Headscale solve by automating the key distribution and NAT traversal. If you have more than a few always-on nodes spread across locations, read the mesh VPN for a home network guide before hand-rolling a config you will regret maintaining.
Getting in when you are behind CGNAT
This is the question that derails more home VPN projects than any other. If your ISP puts you behind CGNAT, you have no forwardable public port, so a classic WireGuard or OpenVPN listener at home is simply unreachable from outside — no amount of port-forwarding fixes it because the port isn’t yours. You have three real options. First, ask your ISP for a real public IPv4 (sometimes free, sometimes a small fee). Second, use IPv6 if both ends have it. Third — and this is what I do as the reliable default — use an overlay like Tailscale or self-hosted Headscale, where both nodes dial outbound to a coordination server and punch through NAT, so neither needs an open inbound port.
To find out which situation you are in: check whether your router’s WAN IP matches the public IP a site like an IP-checker reports. If they differ, you are behind CGNAT or double-NAT. The double-NAT case — your own firewall behind an ISP box — is fixable by bridging the ISP unit or forwarding the WireGuard port through it. My home network troubleshooting guide walks the diagnosis. Dynamic DNS solves the separate problem of a public IP that changes; point a hostname at it and your tunnel config never goes stale.
The part everyone skips: VLAN-aware access
Here is where a thoughtful home VPN separates itself from a one-click toggle. When a remote peer connects, what should it actually be allowed to reach? The lazy answer dumps the client onto the trusted LAN with access to everything. In my setup the VPN interface is its own zone, default-deny, with an allow-list that grants a remote laptop reverse-proxy access to specific services and nothing else — it cannot see the IoT VLAN, the kids’ network, or the guest SSID at all.
This is the same instinct that drives the whole rack: the hydro lab, the workshop sensors, the consoles, and the lab subnet are four different problems on one router, and a VPN client is just one more zone to rule against. If you have not segmented yet, start with my home network VLAN guide and the default-deny VLAN firewall rules — the VPN policy is an extension of those rules, not a separate system. The network segmentation overview explains why this matters, and guest isolation and the IoT VLAN show the same default-deny pattern applied elsewhere.
DNS over the tunnel
A detail that bites people: when you connect a full tunnel from outside, where does DNS resolve? If you leave it on the client’s local resolver you lose your home filtering and your local hostnames stop working — the NAS by name returns nothing. I push my home DNS server over the tunnel so a remote client resolves through Pi-hole (and AdGuard Home as the redundant second resolver) exactly as if it were on the LAN. That keeps network-wide ad blocking and local name resolution working on the road. The full picture is in my home DNS and ad-blocking guide and the broader VPN, DNS and privacy walkthrough.
A reference topology: where the tunnel sits in my rack
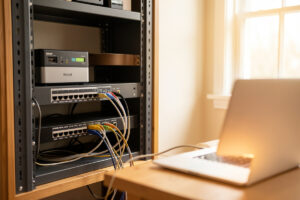
It helps to see the whole picture before you build a piece of it. In my rack the OPNsense appliance is the edge; behind it sits a managed switch carrying tagged VLANs back to the Proxmox host and the access points. The trust zones are MANAGEMENT, LAN/trust, WORK, KIDS, GUEST (fully isolated), IOT (no internet egress except a short whitelist), and a LAB/DMZ segment, plus the per-hobby segments. The WireGuard interface is its own zone alongside those, not a member of any of them.
When my phone connects from outside, it lands on the WireGuard subnet — say 10.6.0.0/24 — and the firewall evaluates its rules exactly as it would for traffic arriving from the KIDS VLAN. By default that means nothing is reachable. I then add narrow allow rules: this peer may reach the reverse proxy on the LAB segment over 443, and the DNS resolver on MANAGEMENT, and nothing else. The NAS, the Proxmox web UI, the cameras — each is an explicit allow, never an accident of being on the same flat network. If you have already built the seven-zone VLAN layout, the VPN is genuinely just zone number eight. That symmetry is the entire design philosophy of this site: every device, local or remote, is untrusted until a rule says otherwise.
Hardening an internet-facing VPN endpoint
A self-hosted VPN listener is a port open to the entire internet, so treat it that way. WireGuard has a genuine advantage here: it does not respond at all to unauthenticated packets. Without a valid key in the handshake the port is silent, which means it does not show up to a casual scanner the way an OpenVPN or SSH banner does. That single property is why I default to WireGuard for anything exposed — the attack surface is a cryptographic handshake, not a login prompt you can brute-force.
Beyond that, a few habits I keep. I run the listener on a non-default UDP port to cut the background noise in the logs (it is not security, just hygiene). Every peer gets its own keypair so I can revoke one device without re-keying the rest — never share a single config across phones. I keep the firewall itself patched, because the VPN is only as trustworthy as the box terminating it, and I watch the handshake timestamps on the OPNsense dashboard so a peer that has gone quiet or a key I no longer recognise is obvious. For the broader edge picture, my network security hardening guide and the OPNsense firewall rules tutorial cover the rule ordering that backs all of this up. The cardinal sin is the opposite of hardening: forwarding a port straight to an unpatched service and calling the VPN optional.
Hardware: what actually terminates the tunnel
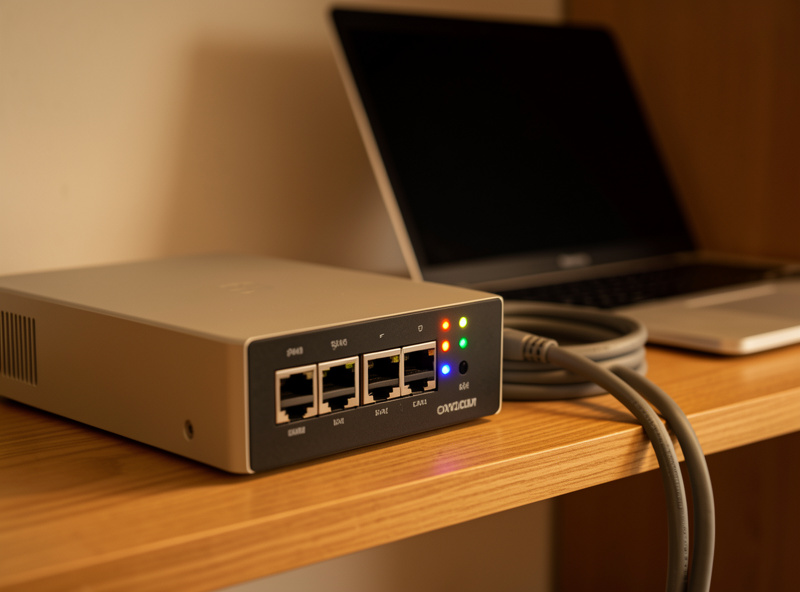
WireGuard is light enough that almost anything will route a home tunnel, but the firewall is doing the encryption, the routing, and the rule enforcement at once, so I do not run it on an underpowered box. My daily driver is a fanless multi-NIC x86 appliance — an Intel N-series quad-i226 class unit — running OPNsense, which handles a saturated WireGuard link without the fans I do not have. If you are sizing hardware, my mini PC roundup and the DIY router hardware guide cover the platforms. A capable fanless N100 firewall mini PC is the sweet spot for most homes.
As an Amazon Associate I earn from qualifying purchases.
The failure modes I have actually hit
Three break more home VPNs than anything else. First, overlapping subnets — if home and the remote network both use 192.168.1.0/24, routing is ambiguous and the tunnel carries nothing useful; I keep my home ranges off the common defaults for exactly this reason. Second, DNS leaks and dead local names from not pushing the home resolver, covered above. Third, a peer that connects but reaches nothing, which is almost always a firewall rule on the VPN interface that was never written — default-deny means default-deny, and a remote client needs an explicit allow rule just like any VLAN. Walk those three before you blame the software.
The fourth one is sneakier because the tunnel looks healthy: a handshake that completes and pings that work, but large transfers stall — a web page half-loads, a file copy hangs. That is almost always an MTU problem. The VPN adds encapsulation overhead, and if the path cannot carry full-size packets the oversized ones silently drop while the small handshake packets sail through. The fix is to lower the tunnel MTU (1420 is a safe WireGuard starting point, lower over PPPoE links), or clamp the MSS on the firewall. I have lost more evenings to MTU than to any config error, because everything looks connected. If your tunnel is up but throughput is broken, suspect MTU before you suspect anything else.
Frequently Asked Questions
Do I need a paid VPN service to access my home network?
No. To reach your own home network you run your own VPN server, which is free software like WireGuard on your firewall. Paid commercial VPNs are for hiding outbound traffic, a completely different job from reaching services at home.
What is the best home VPN protocol for most people?
WireGuard. It is faster, simpler, and has a far smaller codebase than OpenVPN, and it runs natively on OPNsense and pfSense. Choose OpenVPN only when you need to tunnel over TCP port 443 to get through restrictive networks that block everything else.
Can I run a home VPN if my ISP uses CGNAT?
Yes, but not with a standard inbound listener, because CGNAT gives you no forwardable public port. Use an overlay like Tailscale or self-hosted Headscale, where both ends dial outbound and punch through NAT, or ask your ISP for a real public IPv4 address.
Should a remote VPN client see my whole home network?
No. Treat the VPN as its own firewall zone with default-deny and grant only the specific services a remote device needs. In my setup a remote laptop cannot reach the IoT, kids, or guest VLANs at all, only the handful of services its firewall rule allows.
What is the difference between split tunneling and full tunneling?
A full tunnel routes all of a device’s traffic home, which is safest on hostile Wi-Fi. A split tunnel sends only home-network subnets over the VPN and lets everything else use the local connection, which is faster but exposes non-home traffic to the local network.
Where should I run the VPN server, on the firewall or a separate machine?
Terminate it on the firewall when you can, because the firewall already holds the edge interface and enforces your inter-VLAN rules, so the remote peer becomes an interface you can write rules against. Run it on a Proxmox container or VM when you need an overlay or want to isolate the VPN.
Related Guides
- WireGuard vs OpenVPN for Home Use
- Tailscale and Headscale Setup Guide
- Site-to-Site VPN for a Home Lab
- Remote Access to Your Home Network
- VPN Split Tunneling Guide
- Per-Device VPN Policy Guide
- Mesh VPN for a Home Network