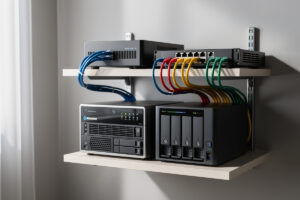
A home network VLAN guide comes down to one decision repeated a dozen times: which devices do you trust, and which do you cage. A VLAN (Virtual LAN, 802.1Q) splits one physical switch and one firewall into many isolated networks, so a compromised smart plug can never reach your laptop. I run seven VLANs on a single OPNsense box at home, and the entire segmentation rides on one trunk port and a default-deny rule set.
This is the pillar guide I wish I had when I tore down my flat ISP network years ago. Below I lay out the full topology I actually run — the VLAN map, the trunk-and-tag discipline on the managed switch, the inter-VLAN firewall rules that hold it together, and the failure modes that bit me so they do not bite you. Every spoke article in this cluster drills into one piece; this page is the map that ties them together.
What a Home Network VLAN Actually Is
A VLAN is a tag — a 12-bit number, 1 to 4094 — that your switch and firewall stamp onto Ethernet frames so devices on the same wire behave as if they are on physically separate networks. That tag is defined by IEEE 802.1Q, whose 12-bit VLAN ID field is what gives the usable range of 1–4094 (IDs 0 and 4095 are reserved). One cable, many isolated subnets. That tag is the entire mechanism: it costs nothing, scales to 4094 segments, and is the difference between a flat network and a defensible one.
On a flat network — the ISP-router default — every device can talk to every other device. Your teenager’s game console, the bargain-bin IP camera with firmware from 2019, the work laptop, and the NAS holding your tax returns all share one broadcast domain. The moment one of those devices is compromised, the attacker has a clear path to all the others. This is called lateral movement, and it is the single most common way a small breach becomes a total one. Segmentation is the wall that stops it.
In my setup each trust zone gets its own VLAN ID, its own subnet, its own DHCP scope, and — critically — its own firewall ruleset governing what it may reach. The VLAN provides the isolation; the firewall provides the policy. People conflate the two constantly. A VLAN alone, with no inter-VLAN firewall rules, is just a tidy way to organize an open network. The security comes from pairing 802.1Q tagging with a default-deny firewall, and that pairing is what this whole cluster is about.
Why I Segment a Home Network at All
I segment because the threats on a modern home network do not come from the internet edge anymore — they come from the cheap, never-updated devices already inside the house. Segmentation contains a breach to one zone. If my IoT VLAN is compromised, default-deny rules mean the attacker is trapped there, unable to reach the trust network, the NAS, or the management plane.
There is a polymath angle here that shaped my whole topology. The home network is the nervous system for every other hobby I run: a hydroponics lab with its own sensors, workshop bench sensors near the welder, the kids’ gaming consoles, a Proxmox host carrying the lab, and a NAS the whole house quietly depends on. Those are genuinely four or five different trust problems on one router. The same instinct that makes me separate hobbies in the workshop makes me separate their traffic — so each lives on its own VLAN, and a problem in one never bleeds into another.
The concrete payoffs I have measured on my own network:
- Breach containment: a compromised IoT device cannot scan or attack the trust subnet — the inter-VLAN rule simply drops the packets.
- Guest isolation: visitors get internet and nothing else; they never see my printers, NAS, or other clients.
- Egress control: my IoT VLAN has no internet access except a short whitelist, which kills the phone-home telemetry and cloud dependency of cheap gear.
- Sane troubleshooting: when something misbehaves, the VLAN structure tells me exactly which zone to look in instead of one flat soup of 60 devices.
- Broadcast hygiene: chatty IoT multicast stays off the subnet where my work calls live.
The VLAN Map I Run at Home
My canonical layout is seven VLANs, each a separate trust zone with its own subnet and policy. Each subnet is carved from the private address ranges set aside in RFC 1918 (10.0.0.0/8, 172.16.0.0/12, 192.168.0.0/16). This is the topology I keep consistent across everything I build — it is worth copying wholesale and then trimming to what you actually need. A first build of three (TRUST, GUEST, IOT) covers 90% of the benefit; you grow into the rest.
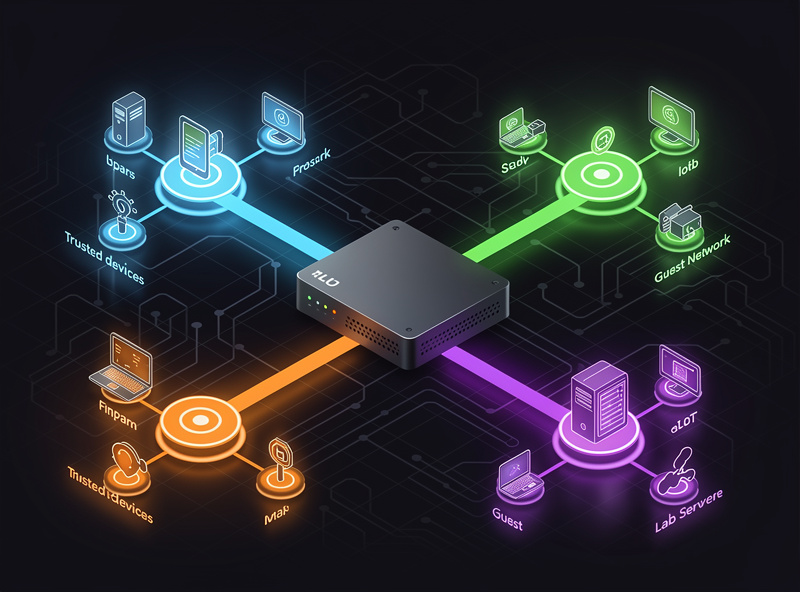
The table below is the actual plan — VLAN ID, the subnet I assign, what lives there, whether it gets internet, and what inter-VLAN access it is granted. Read the right two columns as the security policy; everything else is just addressing.
| VLAN | ID / Subnet | What lives here | Internet | Inter-VLAN access |
|---|---|---|---|---|
| MANAGEMENT | 10 / 10.0.10.0/24 | Firewall, switches, AP controllers, IPMI | Limited (updates only) | None in; reachable only from TRUST admin |
| TRUST / LAN | 20 / 10.0.20.0/24 | Personal laptops, phones, desktops | Full | May reach NAS, IoT control ports, MGMT admin |
| WORK | 30 / 10.0.30.0/24 | Work laptop, work VoIP, corporate VPN | Full | Default-deny to all other VLANs |
| KIDS | 40 / 10.0.40.0/24 | Consoles, tablets, kids’ devices | Full (filtered DNS) | Default-deny; internet only |
| GUEST | 50 / 10.0.50.0/24 | Visitor phones and laptops | Full (rate-limited) | Fully isolated; client isolation on |
| IOT | 60 / 10.0.60.0/24 | Smart plugs, cameras, TVs, sensors | Whitelist only (mostly none) | Reachable from TRUST; cannot initiate out |
| LAB / DMZ | 70 / 10.0.70.0/24 | Proxmox VMs, self-hosted services, reverse proxy | Controlled | Default-deny; explicit allow-list per service |
Two design notes from running this for years. First, MANAGEMENT is the VLAN everyone forgets and the one that matters most — if an attacker reaches your switch and firewall admin interfaces, the segmentation is over. I keep MANAGEMENT unreachable from everything except a single admin host on TRUST. Second, the IOT row is the heart of the whole exercise: it is reachable from TRUST (so my phone can control the lights) but it cannot initiate a connection anywhere — that asymmetry is the entire point, and I cover exactly how to build it in the VLAN for IoT spoke.
The Hardware That Makes VLANs Possible
You need exactly two capable devices: a router/firewall that understands 802.1Q and does inter-VLAN routing with rules, and at least one managed switch that can tag and trunk. Consumer ISP routers do neither properly, which is why segmentation forces you off them — and that is a feature, not a cost.
My daily driver is OPNsense on a fanless multi-NIC x86 appliance (an Intel N-series quad-i226 box), and it is the reliability benchmark I measure everything else against. I have also run pfSense, a UniFi gateway, and MikroTik RouterOS on the bench head-to-head — they all do VLANs well; OPNsense is simply where I landed for the rule-editor and the plugin ecosystem. Behind it sits a Proxmox host carrying the lab VMs and a NAS on its own segment. If you are choosing the box, my DIY router hardware guide and the router OS comparison walk through the tradeoffs.
The switch is where most beginners stall. A flat unmanaged switch cannot carry VLANs — it has no concept of tags. You need a managed L2 (or L2/L3) switch with 802.1Q support: a UniFi, MikroTik, or TP-Link Omada-class unit is plenty for a home. The discipline is tagged-vs-untagged port configuration on a trunk, which I cover end to end in the managed switch setup spoke. Wire your access points back on PoE and map each SSID to a VLAN, and the wireless side inherits the same segmentation as the wired side.
Trunks, Tags, and the One Concept Everyone Trips On
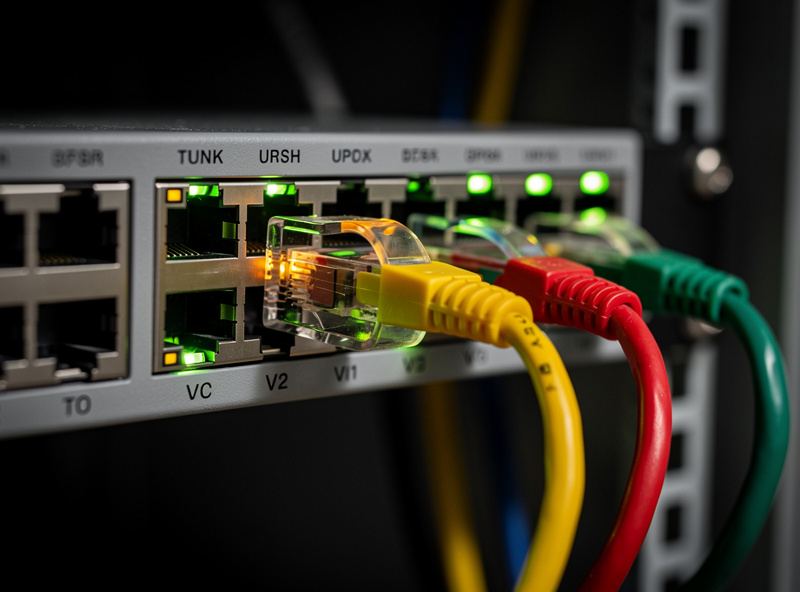
A trunk port carries many VLANs at once by tagging each frame with its VLAN ID; an access port carries exactly one VLAN, untagged, for a single dumb device. Get this distinction right and VLANs are easy. Get it wrong and nothing works — this is the number-one reason a first VLAN build fails to pass traffic.
Here is the mental model I give people. The link between your firewall and your switch is a trunk: every VLAN rides it, each frame stamped with its tag. The link between your switch and a laptop is an access port: it belongs to one VLAN, and the switch strips the tag so the laptop never sees it — the laptop has no idea a VLAN exists. The link to another switch or to a VLAN-aware access point is another trunk. Tagged means “carry the VLAN ID on this frame”; untagged means “this port natively belongs to one VLAN, no tag on the wire.”
The classic mistake is forgetting to tag a VLAN on the trunk to the AP, then wondering why the IoT SSID has no DHCP. The frame leaves the AP tagged VLAN 60, hits a trunk that does not carry VLAN 60, and the switch drops it. Ninety percent of “my VLAN does not work” threads are exactly this. The fix is always the same: trace the path device → switch → trunk → firewall and confirm the VLAN is tagged on every trunk hop and untagged only at the final access port.
Inter-VLAN Firewall Rules: Default-Deny Is the Whole Game
VLANs isolate; firewall rules decide what crosses between them. The only correct posture is default-deny: block all inter-VLAN traffic by default, then add narrow allow rules for the exact flows you need. Everything in my topology table’s “inter-VLAN access” column is one of those deliberate allow rules carved into a wall of deny.
The order matters because firewalls evaluate top-down, first-match-wins. On each VLAN interface I structure rules like this: first allow the device to reach its own gateway for DNS and DHCP; then add the specific cross-VLAN allows (TRUST → IOT control ports, TRUST → NAS); then a block rule to the other RFC1918 ranges so a device cannot hop to sibling VLANs; then allow internet egress last (or deny it, for IOT). The rule that bit me early was placing a broad allow above a specific block — first-match-wins meant the block never fired. Specific rules go on top, broad rules below.
This is deep enough to deserve its own treatment, so the full rule recipes — anti-lockout, the “allow to gateway only” trick, RFC1918 block aliases, and the exact OPNsense/pfSense rule ordering — live in the VLAN firewall rules spoke. If you want the platform-specific UI walkthroughs, see my OPNsense firewall rules tutorial and the pfSense firewall rules guide. For the broader hardening picture — IDS, threat feeds, the lot — the network security hardening guide is the companion pillar to this one.
Guest and IoT: The Two VLANs Everyone Should Build First
If you build only two VLANs, build GUEST and IOT — they deliver the most protection for the least effort. Guest isolation keeps visitors off your internal devices entirely; IoT segmentation cages the riskiest hardware in your house. Together they remove the two largest attack surfaces on a typical home network.
Guest is the simplest: a VLAN with full internet, rate-limiting, client isolation turned on (so guests cannot even see each other), and a hard default-deny to every internal subnet. No printer access, no casting to your TV, no NAS — internet and nothing else. The complete build, including the captive-portal and mDNS questions, is in the guest network isolation spoke.
IoT is the higher-value, trickier one. The goal is reachable-but-not-reaching: my phone on TRUST can control the smart plugs, but the plugs themselves cannot phone home or scan the network. That requires stateful rules (allow TRUST → IOT established/related back) and usually an mDNS reflector so casting and discovery still work across the VLAN boundary without opening the floodgates. I detail the home-specific build — distinct from outdoor/farm sensor setups like my coop IoT VLAN — in the VLAN for IoT spoke. The general theory of how to divide everything else sits in the network segmentation guide.
DNS, Wi-Fi, and Tying the Segments Together
Segmentation is only half a network; you still need DNS, Wi-Fi, and remote access to work across the zones. I run Pi-hole and AdGuard Home in parallel — redundant so the network does not fall over when one is down — with each VLAN pointed at the filtering resolver and the firewall forcing DNS to stay local. That gives me network-wide ad and tracker blocking per zone, with stricter filtering on KIDS.
On Wi-Fi, each SSID maps to a VLAN at the access point: a TRUST SSID, a GUEST SSID, an IOT SSID, all riding the same Wi-Fi 6/6E hardware wired back on PoE. WPA3 where clients support it, fast roaming across multiple wired APs, and mesh treated strictly as a coverage tool — never as a security boundary. If Wi-Fi design is your weak spot, my Wi-Fi 6 guide covers the coverage-versus-throughput tradeoffs. For remote access into the segmented network I run WireGuard terminating on the firewall, landing into a controlled VLAN — see the VPN, DNS, and privacy guide. And put the core gear on a UPS; my UPS sizing guide explains why your DNS and segmentation should outlive a brownout.
The VLAN Mistakes That Cost Me Time
Most VLAN pain is self-inflicted and falls into a handful of repeat offenders. The big three: forgetting to tag a VLAN on a trunk hop, leaving the inter-VLAN rules permissive so the segmentation does nothing, and locking yourself out of the firewall by deploying a deny rule on the management path before the anti-lockout rule.
The others I see constantly: assuming a VLAN equals security on its own (it does not — without firewall rules it is just labeling); putting management on the same VLAN as everything else; forgetting that mDNS and casting do not cross VLANs without a reflector and then declaring “IoT segmentation broke my Chromecast”; and over-segmenting on day one into fifteen VLANs you cannot maintain. Start with three, get the trunk and rules right, and grow. A clean default-deny on three VLANs beats a sloppy free-for-all on fifteen every time.
How to Start Your Own VLAN Build
The fastest path to a working segmented network is a deliberate four-step order: pick capable hardware, plan the VLAN map on paper, configure the trunk and tags on the switch, then write the default-deny firewall rules last. Doing it in that order means you never chase a problem across two layers at once.
- Hardware: a firewall that does 802.1Q (OPNsense/pfSense on x86 is my pick) plus a managed switch. Read the hardware guide first.
- Plan: copy my seven-VLAN map above, trim to TRUST/GUEST/IOT for v1, and write down the subnet and policy for each before touching a config.
- Switch: create the VLANs, set the firewall link as a tagged trunk, set device ports as untagged access ports — full walkthrough in the managed switch setup spoke.
- Firewall: create the VLAN interfaces, DHCP scopes, and the default-deny ruleset with your narrow allows — recipes in the VLAN firewall rules spoke.
Work through the spokes in that sequence and you will have a properly segmented home network — the kind that contains a breach instead of broadcasting it — running on hardware you actually understand.
Frequently Asked Questions
What is a home network VLAN in simple terms?
A VLAN is a tag (a number from 1 to 4094) that your switch and firewall stamp onto network traffic so one physical network behaves as several isolated ones. It lets a compromised smart plug be trapped on its own segment, unable to reach your laptop or NAS, using one switch and one firewall instead of separate hardware.
Do I need a managed switch for VLANs?
Yes. An unmanaged switch has no concept of 802.1Q tags and cannot carry or separate VLANs. You need a managed L2 or L2/L3 switch (UniFi, MikroTik, or TP-Link Omada class is plenty for a home) plus a firewall that does VLAN routing. The switch handles tagging and trunking; the firewall handles the rules between VLANs.
How many VLANs should a home network have?
Start with three: TRUST for personal devices, GUEST for visitors, and IOT for smart-home gear. That covers about 90 percent of the security benefit. Grow into WORK, KIDS, MANAGEMENT, and a LAB or DMZ segment as you need them. A clean default-deny on three VLANs beats a sloppy setup on fifteen.
Is a VLAN enough to secure my network on its own?
No. A VLAN only isolates traffic into separate segments; the security comes from the firewall rules between them. Without a default-deny inter-VLAN ruleset, a VLAN is just a tidy way to organize an open network. You must pair 802.1Q tagging with explicit allow rules carved into a wall of deny.
Why does my new VLAN have no internet or DHCP?
Almost always a trunk tagging error. The VLAN is not tagged on every trunk hop between the device and the firewall, so the switch drops the frames. Trace the path device to switch to trunk to firewall and confirm the VLAN ID is tagged on each trunk and untagged only at the final access port serving the device.
Can devices on different VLANs still talk to each other?
Only if you write a firewall rule allowing it. By default each VLAN is isolated. I allow my TRUST devices to reach IoT control ports and the NAS, but block IoT from initiating any connection back. That asymmetry, controlled by stateful inter-VLAN rules, is what makes segmentation both secure and usable.
Does VLAN segmentation slow down my network?
No, on capable hardware. Inter-VLAN routing happens at the firewall, and any modern x86 firewall appliance routes gigabit between VLANs without breaking a sweat. Traffic that stays within a VLAN is switched at line rate and never touches the firewall at all. The only bottleneck is undersized hardware, not the VLANs themselves.
Related Guides in This Cluster
- Guest Network Isolation: Lock Visitors Out of Everything Internal
- VLAN Firewall Rules: The Default-Deny Recipes I Run
- Managed Switch Setup: Trunks, Tags, and Access Ports
- Network Segmentation: How to Divide a Home Network
- VLAN for IoT: Caging Smart-Home Devices