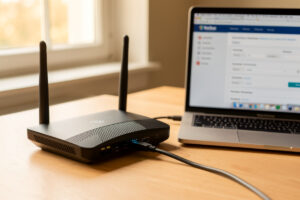
OpenWrt is open-source Linux firmware that replaces the software your router shipped with, turning a $100 consumer box into a configurable router with real VLANs, a proper package manager, WireGuard, and SQM bufferbloat control. It runs on more than 1,500 supported devices and gives you settings the stock firmware deliberately hides.
I should be upfront about where OpenWrt sits in my own setup, because it shapes everything in this guide. My edge firewall is OPNsense on a dedicated fanless x86 box — that is the spine the whole house routes through, and it is not going anywhere. OpenWrt earns its keep everywhere else: the wired access points, the travel router that lives in my bag, and the spare consumer box I keep flashed for testing before anything touches the production rack. That is the honest role for it in a layered homelab, and it is the lens I write from here.
What OpenWrt Actually Is (and Isn’t)
OpenWrt is a full Linux distribution built for routers and embedded network gear. Instead of the locked-down web panel your manufacturer ships, you get a real filesystem, the opkg/apk package manager, a unified config system (UCI) under /etc/config/, and the LuCI web interface on top of it. The current stable line is the 23.05 and 24.10 series, and either one will outlive the firmware your vendor abandons in eighteen months.
What it is not is a firewall-appliance OS in the OPNsense or pfSense sense. OpenWrt runs beautifully on the low-power ARM and MIPS silicon inside consumer routers, where a full BSD firewall would never fit. If you want the difference spelled out across all three, I wrote a dedicated router operating system comparison — the short version is that OpenWrt is the right tool when the hardware is small and the budget is tight, and a dedicated firewall is the right tool when you are routing a gigabit symmetric line with deep packet inspection.
The reason any of this matters: the firmware that came on your router is built to a price and a support deadline. It stops getting security patches, it caps your DHCP scope, it gives you one flat network with no segmentation, and its DNS is whatever the vendor felt like shipping. OpenWrt removes every one of those ceilings.
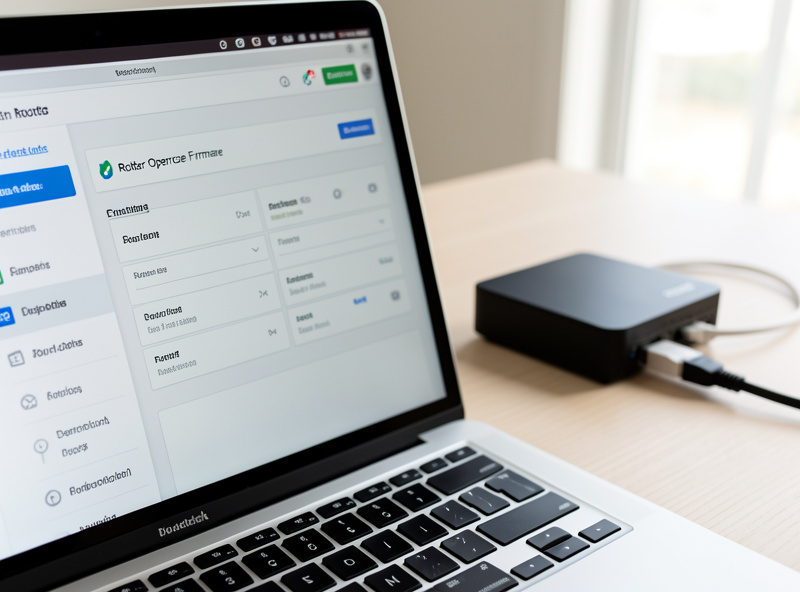
Is Your Router Even Supported? Check the Table of Hardware First
Before anything else: OpenWrt only runs on hardware someone has ported it to. The authoritative list is the OpenWrt Table of Hardware, and you check your exact model and revision there before you download a single image. A TP-Link Archer C7 v2 and a v5 are different boards with different images, and flashing the wrong one is how people brick routers.
The thing the Table of Hardware tells you that the marketing never will is the flash and RAM size. A device with 8 MB of flash and 64 MB of RAM technically boots OpenWrt but leaves you no room to install packages — no WireGuard, no SQM, no ad-blocking. The sweet spot for a real OpenWrt build in 2026 is 128 MB of flash and 256 MB or more of RAM, which is exactly why the device recommendations have shifted toward newer silicon. I go deep on which boxes clear that bar in my guide to the best routers for OpenWrt in 2026.
If your current router is on the list and has the memory headroom, flash it and learn on it — that is the cheapest possible entry. If it is a closed, 8 MB throwaway, do not fight it; buy a known-good target instead.
Flashing OpenWrt: Factory Image, sysupgrade, and the Recovery Plan
Installing OpenWrt the first time uses a factory image — an image specifically packaged to be accepted by the stock firmware’s own update page, or pushed over TFTP into the bootloader. Once OpenWrt is on the device, every later update uses a sysupgrade image instead, which the OpenWrt system flashes itself and can optionally carry your config across.
The single rule that keeps you out of trouble: know your recovery path before you flash, not after. Most supported routers have a TFTP recovery or a failsafe mode you can drop into by holding the reset button during boot, and on the boxes I keep around I always have a serial console cable in the drawer for the day the bootloader argues. A device with an unbrickable U-Boot recovery is worth paying a little more for precisely because of this. I walk through the whole sequence — backup, factory flash, first boot, and recovery — step by step in how to install OpenWrt.
One honest warning that the influencer videos skip: the moment OpenWrt first boots, it comes up with no Wi-Fi enabled and a wired LAN on 192.168.1.1. That is not a failure — it is the secure default. You connect a laptop by Ethernet, browse to LuCI, set a root password, and bring the radios up yourself.
OpenWrt vs the Firmware It Replaces
The decision most people are actually weighing is not OpenWrt against pfSense — it is OpenWrt against the perfectly functional firmware already on the router. That trade is real and worth taking seriously, so I gave it its own full treatment in OpenWrt vs stock firmware. Here is the honest summary in one table.
| Capability | Typical Stock Firmware | OpenWrt |
|---|---|---|
| Security updates | 12–24 months, then abandoned | Community patches for years per release |
| VLAN segmentation | Rare; one or no extra network | Full 802.1Q with DSA bridge VLANs |
| VPN server | Sometimes basic OpenVPN | WireGuard and OpenVPN, server or client |
| Bufferbloat / QoS | Crude or absent | SQM with CAKE — the real fix |
| DNS control | Vendor DNS, limited overrides | Full dnsmasq, DoT/DoH, ad-blocking |
| Package ecosystem | None | Thousands of packages via opkg/apk |
| Hand-holding | High — it just works | Lower — you own the config |
The honest cost in that last row is the one to respect. Stock firmware asks nothing of you; OpenWrt asks that you understand your own network. If you have read this far, you are the kind of person that trade favors.
Segmentation: The Reason Most Homelabbers Flash in the First Place
The feature that pulls serious home users to OpenWrt is real VLAN support. On stock firmware you usually get one flat network where the kids’ consoles, your work laptop, and every cheap IoT plug all sit in the same broadcast domain talking to each other. That is the exact problem I solve with segmentation across my whole house: in my setup the hydro lab, the workshop bench sensors, the kids’ gaming devices, and the lab subnet are four different trust zones, and inter-VLAN traffic is default-deny with a short allow-list.
Modern OpenWrt does VLANs through DSA — Distributed Switch Architecture — which replaced the old swconfig system. In practice that means you configure bridge VLAN filtering, tag the trunk port, and assign untagged access ports per network, the same 802.1Q discipline you would use on a managed switch. I cover the full bridge-VLAN walkthrough in OpenWrt VLAN configuration, and if you are pairing the router with a separate switch, the managed switch primer explains the trunk side.
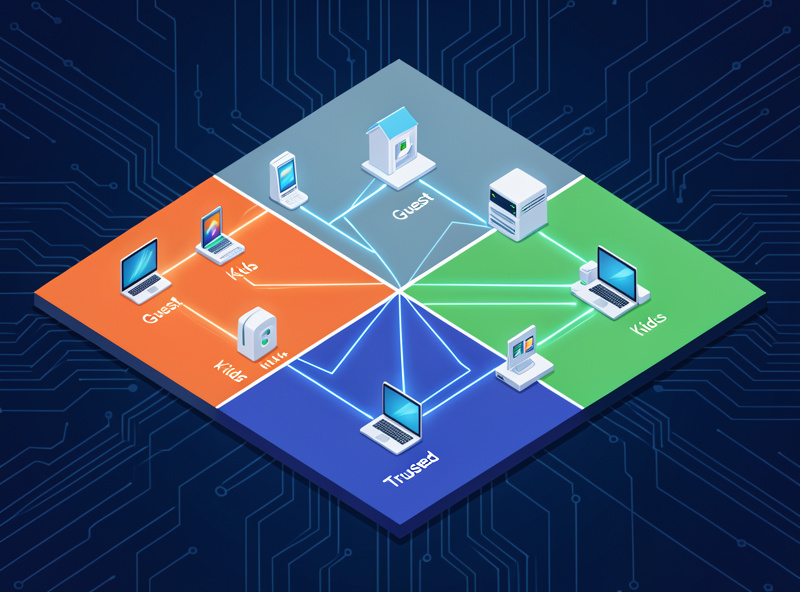
The single most useful VLAN you will build is an isolated IoT segment with no internet egress except a whitelist. Every smart plug, camera, and TV stick goes there, and the day one of them turns out to phone home to something it should not, it simply cannot. That is segmentation doing its actual job — not theoretical hardening, just a cheap camera that can no longer reach the trusted laptop.
VPN, DNS, and the Services Worth Adding
Once OpenWrt is on the box, the package manager is where it stops being a router and starts being a small Linux server. The three additions I put on nearly every OpenWrt build, in order of payoff:
WireGuard for remote access. A modern OpenWrt router makes an excellent WireGuard endpoint — lightweight, fast, and trivial to bring up compared with the OpenVPN era. It lets you reach your home network from anywhere as if you were on the LAN. The full setup, including the part where CGNAT breaks your inbound connection, is in my OpenWrt VPN setup guide, and if you are still choosing protocols, WireGuard vs OpenVPN settles it.
DNS-level filtering. OpenWrt’s dnsmasq already handles your DNS, so pointing it at an upstream over DoT, or running a blocklist on the router itself, is a natural fit. On larger networks I prefer a dedicated AdGuard Home or Pi-hole box, but a small OpenWrt router can do respectable ad-blocking on its own.
SQM for bufferbloat. If your connection feels laggy under load — video calls stuttering while someone uploads — that is bufferbloat, and SQM with the CAKE queue discipline is the genuine fix, not a placebo slider. I explain how to measure it and dial it in under SQM and QoS on OpenWrt.
Using OpenWrt as a Pure Access Point
Not every OpenWrt device should route. One of the most useful things you can do with a flashed router is turn it into a “dumb” access point — radios and switching only, with all routing, DHCP, and firewalling left to your main router or firewall. This is exactly how I extend wired-back Wi-Fi coverage without letting a consumer box make routing decisions it has no business making.
The conversion means disabling DHCP and the firewall on the OpenWrt box, bridging its LAN, giving it a static management address, and uplinking it on a LAN port (never the WAN port). Done right it adds coverage and VLAN-aware SSIDs while your real router stays in charge. I cover the whole conversion in OpenWrt as a dumb access point, and the broader case for this layout is in wired access points vs mesh. Mesh is a coverage tool, never a security boundary — wired backhaul wins every time you can pull the cable.
Picking Hardware: What I Actually Flash
For someone starting now, the hardware question divides cleanly. If you want a single capable router, the current generation of WiFi-6 boxes built on MediaTek Filogic silicon (the kind GL.iNet ships in the Flint line) has the flash and RAM headroom OpenWrt needs and strong upstream support. If you want maximum throughput with SQM enabled at multi-gigabit, an x86 mini-PC or an ARM board like the FriendlyElec R-series pulls ahead, because shaping traffic costs CPU and small router SoCs run out of headroom first.
You can browse current OpenWrt-friendly routers and check them against the Table of Hardware on Amazon before you commit. As an Amazon Associate I earn from qualifying purchases. Whatever you pick, the order of operations is the same: confirm the exact revision on the Table of Hardware, confirm a recovery path, then flash. My full ranked picks — with the memory and CPU reasoning behind each — live in the best routers for OpenWrt roundup.
The First Fifteen Minutes in LuCI
The gap between “OpenWrt is flashed” and “OpenWrt is actually configured” is about fifteen minutes of LuCI, and doing it in the right order saves you from locking yourself out. The sequence I follow on every fresh flash is the same one I would tell anyone to memorize.
Connect by Ethernet to a LAN port and browse to 192.168.1.1. The very first action is setting a root password under System → Administration — until you do, LuCI nags you and SSH is wide open on the LAN. Next, configure the WAN interface for how your line actually delivers an address: DHCP for most cable and fibre, PPPoE where your ISP still insists on it. Only once you have confirmed internet on the wired side do I touch the radios, because misconfiguring Wi-Fi is the fastest way to lose your own management connection on a wireless-only setup.
Bring the radios up under Network → Wireless, set the country code (it is blank by default and that quietly caps your transmit power and channels), choose WPA3 or WPA2-PSK, and only then enable the interface. Save and apply commits the change with a rollback timer — if you lose contact, OpenWrt reverts after a couple of minutes rather than stranding you. That rollback safety net is one of the quietly brilliant parts of the platform.
Backups, Snapshots, and Painless Recovery
The flip side of owning your config is that you are responsible for it. The whole of an OpenWrt configuration lives as plain text under /etc/config/, which means a backup is genuinely just an archive of that directory — System → Backup/Flash Firmware exports the lot as a small tarball. I take that backup before every meaningful change and keep the last few on the NAS, because restoring a working config takes thirty seconds and rebuilding one from memory takes an evening.
When you upgrade to a new release, the sysupgrade process can carry that config across with the “keep settings” option, and the attended-sysupgrade package will even rebuild an image with your installed packages baked in. The one time you deliberately do not keep settings is a major version jump where the underlying network model changed — the swconfig-to-DSA transition being the classic example, where carrying an old config forward causes more confusion than starting clean and re-importing your interface definitions by hand.
Hardening an OpenWrt Router
OpenWrt ships sensibly secure, but a few deliberate choices separate a router from a hardened one. Disable WAN-side access to LuCI and SSH entirely — the management plane should never be reachable from the internet; if you need remote administration, reach it over WireGuard instead. On the LAN side I move SSH to key-only authentication and disable password login once my keys are in place.
The firewall itself is nftables-based on modern releases and follows the same default-deny philosophy I run on OPNsense: traffic from a less-trusted zone to a more-trusted one is dropped unless a rule explicitly permits it. The mistake I see repeatedly is people creating VLANs and then leaving the inter-zone forwarding wide open, which gives you the cosmetic appearance of segmentation with none of the protection. Build the zones, then write the allow-list deliberately — the segmentation is only as real as the firewall rules behind it.
OpenWrt’s Forks and Cousins
OpenWrt is the upstream that a surprising amount of the consumer market quietly builds on. GL.iNet’s travel and home routers ship a friendly GUI layered over a real OpenWrt base, which is why they are such a soft landing for newcomers — you get the simplified interface out of the box and can drop into stock LuCI underneath when you outgrow it. Projects like Gargoyle add their own front end on top of OpenWrt as well.
The older names people still ask about — DD-WRT and Tomato — came from the same early custom-firmware era but have diverged. DD-WRT supports a huge hardware list but its release model is murkier; Tomato has a smaller, mostly Broadcom-focused following. For a home user starting fresh in 2026, OpenWrt is the one with the largest active developer community, the cleanest upgrade path, and by far the deepest package ecosystem, which is why it is the one I build on. The full three-way platform decision against the firewall OSes is in my router OS comparison.
The Failure Modes I’ve Actually Hit
The parts a spec sheet never reaches are the ways this bites you, so here are the real ones. Flashing a sysupgrade image when the device wanted a factory image (or vice versa) gets you a refusal at best and a confused bootloader at worst — match the image type to the situation. Forgetting the country code on the radios left me wondering why range was poor until I realized the transmit power was throttled to the most restrictive global default.
The one that genuinely cost me an evening early on was migrating an old swconfig VLAN config onto a DSA-based release by carrying settings forward. The two models describe switch ports completely differently, and the imported config produced a router that booted but had no working LAN. The fix was a clean flash without keeping settings and rebuilding the bridge VLANs from scratch — which took ten minutes once I stopped fighting the old config. Lesson logged: on a major architecture change, start clean.
And the universal one: have your recovery path tested before you need it. Drop into failsafe mode once on purpose, confirm you can reach 192.168.1.1 in recovery, and know where your serial console cable is. The difference between a tense afternoon and a five-minute fix is entirely whether you rehearsed the recovery while everything was still working.
Where OpenWrt Fits in a Layered Network
The mistake I see most often is treating OpenWrt as an all-or-nothing decision: either it is your whole network or it is nothing. In a real homelab it is one layer. Mine looks like this, and it is worth describing because it shows where each tool belongs:
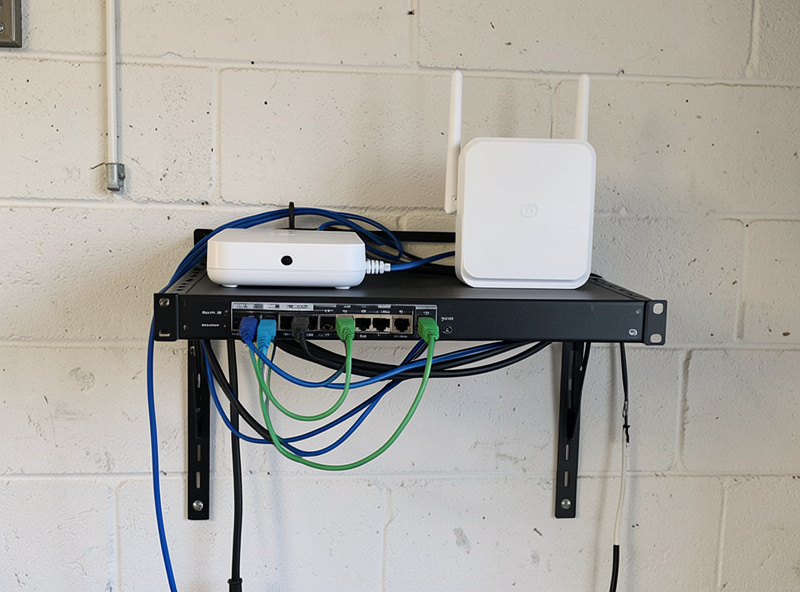
OPNsense on dedicated hardware does the edge routing, the inter-VLAN firewall rules, and the heavy lifting. A managed switch carries the tagged trunk. OpenWrt-flashed access points hang off that trunk on PoE, broadcasting separate SSIDs mapped to separate VLANs. If you are choosing between firewall platforms for that edge box, OPNsense vs pfSense is the comparison I keep coming back to. And the wireless standard you target for those APs is its own decision — Wi-Fi 6E vs Wi-Fi 7 covers how much radio a home actually needs.
You do not need that whole stack to start. A single OpenWrt router with a properly built IoT VLAN, WireGuard for remote access, and SQM tuned to your line is already a dramatic upgrade over anything the ISP handed you — and it is the foundation everything else bolts onto.
A Realistic First Week with OpenWrt
If you are coming from a stock router, resist the urge to build the whole segmented network on day one. The way I onboard anyone is staged, so each layer is proven before the next goes on top. Day one is simply: flash, set the root password, get WAN working, bring up a single Wi-Fi network with WPA3, and live on it for a day to confirm stability. That alone replaces an abandoned-firmware router with one that still gets patched.
The middle of the week is where the payoff arrives. Add SQM and run a bufferbloat test before and after — watching the latency-under-load number collapse is the moment most people understand why they bothered. Then stand up WireGuard so you can reach home from your phone on mobile data, which doubles as your proof that remote access works before you depend on it.
Segmentation is the graduate project, and it deserves its own unhurried session. Build the IoT VLAN first because it is the highest-value, lowest-risk one: a separate network with no path to your trusted devices and no internet egress except a whitelist. Move one device onto it, confirm it still works and genuinely cannot reach your laptop, then migrate the rest. By the end of a week you have gone from a flat ISP network to a patched, shaped, segmented, remotely-accessible router — and you understand every layer because you built them one at a time. That understanding is the entire point; it is what the stock firmware never gave you and what no influencer video can install for you.
Frequently Asked Questions
Is installing OpenWrt safe, or will it brick my router?
It is safe on supported hardware if you check the Table of Hardware for your exact model and revision first and know your recovery path before flashing. Most routers have TFTP or failsafe recovery. Flashing the wrong image for the revision is the main way devices get bricked.
Does OpenWrt make my router faster?
Not raw NAT throughput on most hardware, but it makes the connection feel faster by fixing bufferbloat with SQM and CAKE. Under load, latency drops from hundreds of milliseconds to single digits, which matters far more for video calls and gaming than peak speed.
Can OpenWrt do VLANs and network segmentation?
Yes, fully. Modern OpenWrt uses DSA bridge VLAN filtering for proper 802.1Q tagging, so you can split IoT, guest, kids, and trusted devices into separate trust zones with default-deny rules between them. This is the main reason homelabbers flash it.
Do I lose my Wi-Fi when I install OpenWrt?
Temporarily. OpenWrt boots with radios disabled and a wired LAN on 192.168.1.1 as a secure default. You connect by Ethernet, set a root password in LuCI, then enable and configure the Wi-Fi yourself with WPA3 or WPA2.
How much flash and RAM does OpenWrt need in 2026?
Aim for at least 128 MB of flash and 256 MB of RAM for a useful build with room to add WireGuard, SQM, and ad-blocking. Older 8 MB flash devices boot but leave no space for packages, so they are learning toys rather than daily drivers.
Should OpenWrt replace my firewall like OPNsense or pfSense?
Not usually. OpenWrt excels on small low-power consumer hardware; OPNsense and pfSense are full firewall platforms for x86 boxes routing high-bandwidth lines with deep inspection. In a layered network OpenWrt often runs the access points while a dedicated firewall handles the edge.
Related Guides
- How to Install OpenWrt: Step-by-Step
- Best Routers for OpenWrt in 2026
- OpenWrt vs Stock Firmware
- OpenWrt VLAN Configuration
- OpenWrt VPN Setup Guide
- OpenWrt as a Dumb Access Point
- SQM and QoS on OpenWrt