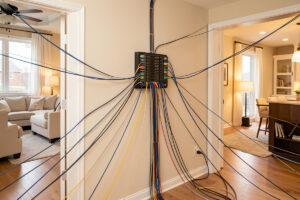
Structured home network wiring means running every data drop in the house back to one central point as an unbroken home-run star — one cable per device, no daisy-chaining, no splices, terminated on a patch panel at one end and a keystone jack at the other. It costs more cable than ad-hoc wiring, but it’s the only topology you can test, fault-isolate, and grow for twenty years without opening a wall.
This is the layout I run at home, and it’s the single decision that makes everything above it — VLANs, PoE access points, the NAS, the lab — behave. When people ask why their network is flaky, half the time it’s because someone chained a switch off a wall jack off another switch and nobody can say which cable is in the path of a given fault. A structured star never has that problem: every drop is its own independent, testable circuit. This guide is how I’d plan and wire one from scratch.
What “structured wiring” actually means
Structured wiring is a standardised, documented cabling system: a central distribution point (your patch panel and rack), permanent home-run links to every outlet, consistent termination on both ends, and labels and test results for each run. The defining feature is the home-run star — every cable goes from the panel directly to one outlet, with nothing spliced or chained in between.
The opposite — what most houses come with — is unstructured: a cable here, a switch chained there, a jack wired to another jack, no documentation, no test data. It works until it doesn’t, and when it doesn’t you can’t tell which segment is the problem. A structured approach front-loads the discipline: you decide the topology once, wire to it consistently, and the payoff is a network where every fault is traceable to exactly one cable. It’s the same instinct I apply to the rest of the workshop — separate the things that can fail independently so a problem in one never becomes a mystery across all of them. The whole physical layer fits inside the broader home network cabling guide; this article is specifically about the topology and layout.
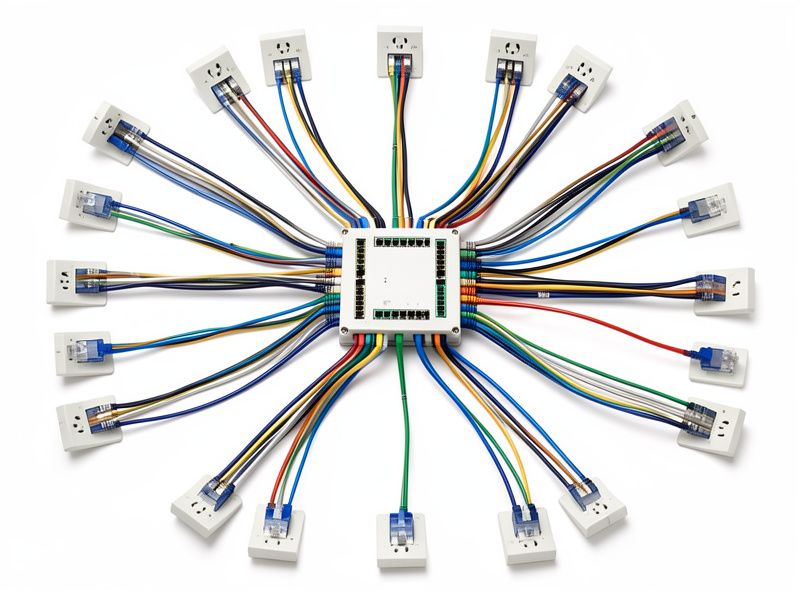
The home-run star: one cable, one device
In a home-run star, every outlet has its own dedicated cable back to the patch panel — nothing is shared, chained, or split. A 12-drop house means 12 cables landing on the panel. This is non-negotiable for a network you intend to keep, because it’s what makes any single run independently testable and replaceable without disturbing anything else.
The temptation, always, is to save cable by chaining: run one cable to a room, put a little switch there, fan out locally. Resist it for permanent infrastructure. Every chained hop adds a point of failure you can’t isolate, ties the room’s whole capacity to one uplink, and makes VLAN trunking awkward. A small switch at a desk for three devices that genuinely can’t be home-run is fine as an exception — I have one at my bench — but it’s an exception, not the architecture. The rule I wire to: if it’s going in the wall, it’s a home run to the panel. The panel then patches into a managed switch, and that’s where any fan-out or VLAN tagging happens, in one place you can actually manage.
Where to put the central point
Put the rack and patch panel as close to the geographic centre of the house as you can, ideally where the ISP service enters or near it, with mains power, some airflow, and room to work. Central placement minimises your longest run, which keeps every drop comfortably inside the 90-metre permanent-link limit.
This is worth thinking about before you pull a single cable, because the panel location sets your worst-case run length. A panel in a far corner of the basement means the run to the opposite upstairs corner might push 50–60 metres — still fine for Cat6, but you’ve spent distance budget you didn’t need to. I’d rather a slightly less convenient central closet than a convenient corner that strands my longest runs. Practical needs at the central point: a power outlet (ideally its own circuit), enough wall or floor space for a 6U–12U rack, and somewhere the ISP’s ONT or modem can live next to your firewall. The full physical side — sizing and mounting the rack, power, cooling — is the home network rack setup guide.
How many drops per room
Run at least two drops to every location you care about, and three or four to the obvious hubs — the desk, the TV wall, the living room. Cable pulled during construction or a renovation is almost free; a drop added later means opening a wall. Over-provisioning at install time is the cheapest insurance in the whole project.
Here’s how I’d allocate for a typical house, and roughly how I did mine:
- Office / desk: 3–4 drops. A workstation, a dock, a second machine, a printer, and you’ve used them. This is where you’ll be glad you over-pulled.
- TV / media wall: 2–3 drops. TV, console, a streaming box, maybe an AP if it’s central.
- Ceiling AP locations: 1 drop each, run to where an access point will actually mount, not where it’s convenient to terminate. Wired-back APs are the whole point of the wired Wi-Fi layout.
- Every other room: at least 1, preferably 2. Bedrooms become offices; offices become nurseries; you never know.
- Cameras / outdoor: 1 PoE drop each, planned with the PoE power budget in mind.
The marginal cost of a second cable in the same wall cavity is a few metres of cable and ten minutes. The cost of the cable you didn’t pull is drywall repair and a Saturday. Pull more than you think you need.
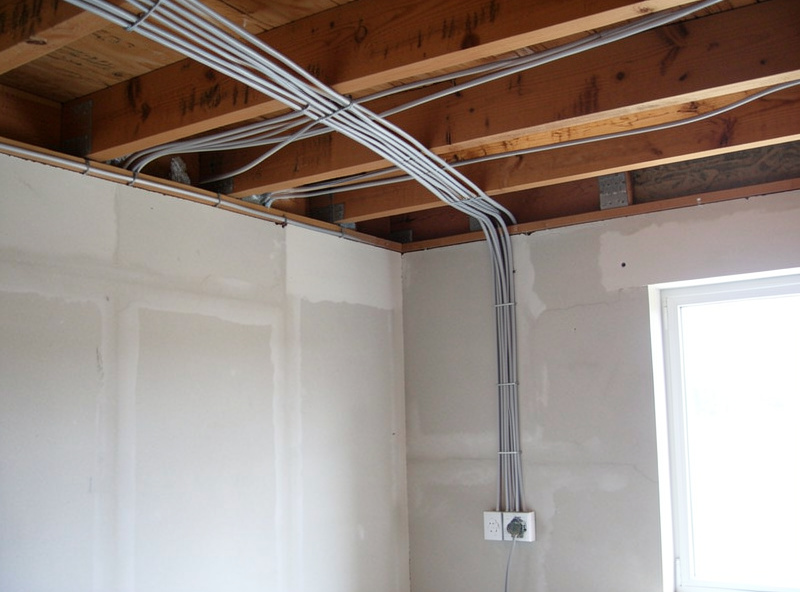
Conduit and pull strings: future-proofing the route
Wherever you can, run smurf tube (flexible conduit) between floors and to key locations instead of bare cable, and leave a pull string in every conduit. Conduit turns “open the wall to add a cable” into “tie on the new cable and pull” — it’s how you upgrade to fibre or extra runs years later without demolition.
This is the trick that separates people who wired once and never touched it from people who keep upgrading painlessly. A length of conduit from the central point up to the attic, or down to a crawlspace, with a few extra cables and a pull string left in it, means the next time you want to add 10G to a room or run fibre to the garage, you pull the new line through existing conduit in an hour. I ran conduit on the vertical runs between floors for exactly this reason — the horizontal runs through the attic are easy to add to, but getting between floors later is the hard part, so that’s where the tube earns its keep. Even if you only do the vertical risers, do those.
Multi-floor and detached buildings
For a multi-floor home, run vertical risers between floors in conduit and home-run each floor’s drops down to the central panel; for a detached garage or workshop, run fibre, not copper. Copper between buildings invites ground-loop and lightning-surge damage because the two buildings sit at different ground potentials — fibre carries no current and sidesteps the problem entirely.
The single-building case is straightforward: pick your central floor, riser the cable up and down in conduit, home-run everything. The detached-building case is where people get bitten. Running a copper Ethernet cable out to a garage seems fine until a nearby lightning strike couples a surge onto it and takes out a switch port at each end — or until a persistent ground-potential difference between the two buildings quietly degrades the link. The correct answer is a fibre run to the outbuilding with a small switch or media converter at each end. It’s not exotic anymore, and it’s the right tool. This is the same logic that makes me put a separate building’s devices on their own segment once they’re connected — and it ties into how I’d map physical drops to VLANs across the whole house.
Wiring standard and documentation
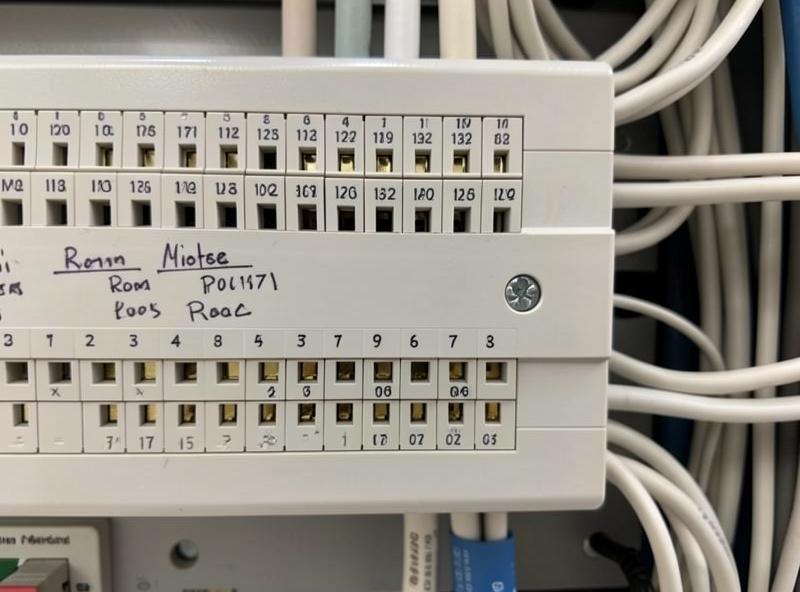
Pick one termination standard — T568B is the residential default in most of the world — and use it on every jack and panel port without exception. Then document everything: number every panel port, label both ends of every run, and keep a simple sheet mapping port numbers to room locations.
The standard matters because T568A and T568B are electrically identical but mixing them within a single run accidentally creates a crossover. Pick B, write it on a label inside the rack, and never deviate — consistency is the entire benefit. Documentation matters because a year from now you will not remember which panel port feeds the back bedroom. I number panel ports, put a matching number on each wall plate, and keep a one-page map. When a drop goes dead, I look at the map, find the port, test that one run, swap that one patch cord — minutes, not a treasure hunt. The actual punch-down process and the T568B pinout are covered step by step in the keystone and patch panel installation guide, and every run gets a wiremap before the wall closes per the cable testing guide.
What this enables once it’s in
A structured star is the foundation the rest of the network needs. Because every drop is independent and lands in one place, you can assign any drop to any VLAN at the switch, move a device’s network membership without touching a wall, isolate a fault to one cable, and grow capacity per-run rather than all-or-nothing. That’s what makes serious segmentation, a properly placed NAS, and clean network hardening practical instead of theoretical. I wired the house this way before I ever cared about VLANs, and it’s the reason adding them later was a switch-config afternoon rather than a re-cabling project.
Frequently Asked Questions
What is structured home network wiring?
It is a standardised, documented cabling system: every outlet runs back to one central patch panel as an unbroken home-run star, terminated consistently at both ends, with labels and test results for each run. Nothing is spliced or daisy-chained, so every drop is independently testable and replaceable.
How many Ethernet drops should I run to each room?
At least two to every location you care about, and three or four to hubs like the desk and TV wall. Cable pulled during construction is almost free, while adding a drop later means opening a wall. Over-provisioning at install time is the cheapest insurance in the whole project.
Where should the central patch panel go?
As close to the geographic centre of the house as practical, ideally near where the ISP service enters, with mains power, some airflow, and room to work. Central placement minimises your longest run, keeping every drop comfortably inside the 90-metre permanent-link limit.
Can I daisy-chain switches instead of home-running every cable?
For permanent in-wall infrastructure, no. Every chained hop adds a fault point you cannot isolate and ties a room’s whole capacity to one uplink. A small switch for a few devices that genuinely cannot be home-run is a fine exception, but the architecture should be one cable per outlet back to the panel.
Should I use conduit when wiring a house for network?
Yes, especially on vertical runs between floors. Conduit with a pull string left inside turns a future upgrade into tying on the new cable and pulling it, instead of opening walls. Even if you only conduit the vertical risers, do those, since getting between floors later is the hard part.
How do I wire network to a detached garage or workshop?
Run fibre, not copper. Copper between separate buildings invites ground-loop and lightning-surge damage because the buildings sit at different ground potentials. Fibre carries no current, sidesteps the problem entirely, and is no longer exotic with pre-terminated cable and cheap media converters at each end.
Related Guides
- Home Network Cabling Guide (hub)
- Keystone and Patch Panel Installation Guide
- Home Network Rack Setup Guide
- Fibre Runs for a Home Network
- Home Network VLAN Guide