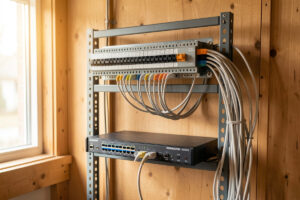
Home network cabling is the one layer of a homelab you only get to do well once, so do it deliberately: pull solid-copper Cat6 or Cat6a in the walls, land every run on a patch panel, keep each run under the 90-metre permanent-link limit, and never run data parallel to mains power. Get that right and the network you build on top of it — VLANs, Wi-Fi, NAS, the lot — stops fighting you.
I run a fully segmented network at home in Sweden: a Proxmox host as the spine, OPNsense on dedicated hardware doing the routing, managed switches trunking VLANs out to every room, and the hydro lab, the workshop sensors, the kids’ consoles and the IoT junk all living on separate trust zones. None of that segmentation means anything if the physical layer underneath it is flaky. This guide is the cabling half of that build — the part the influencer videos skip because it isn’t glamorous. It is, however, the part that decides whether your 2.5G and 10G dreams ever actually materialise or just throw retransmits at you for years.
What “home network cabling” actually covers
Home network cabling is the structured copper and fibre that carries data between your rooms, your rack, and your devices — permanent in-wall runs terminated at both ends, the patch panel that organises them, and the patch cords that connect everything to switches. A proper job means every drop is documented, tested, and lands somewhere you can manage it, not a rat’s nest behind the TV.
People conflate “cabling” with “buying a long Ethernet cable.” That’s patching, not cabling. Real home network cabling is the whole physical layer: the cable type you pulled, the jacket rating for where it runs, the keystone jacks at the wall plate, the patch panel in the rack, and the test report that proves the run will actually carry the speed you paid for. I treat it as infrastructure with a 20-year lifespan, because that’s roughly what in-wall copper gets you before the next standard makes you think about it again. The active gear — switches, APs, the firewall — I expect to swap every few years. The cable in the wall I expect to leave alone for two decades. That asymmetry should drive every decision you make here.
Cable types: what to pull and where
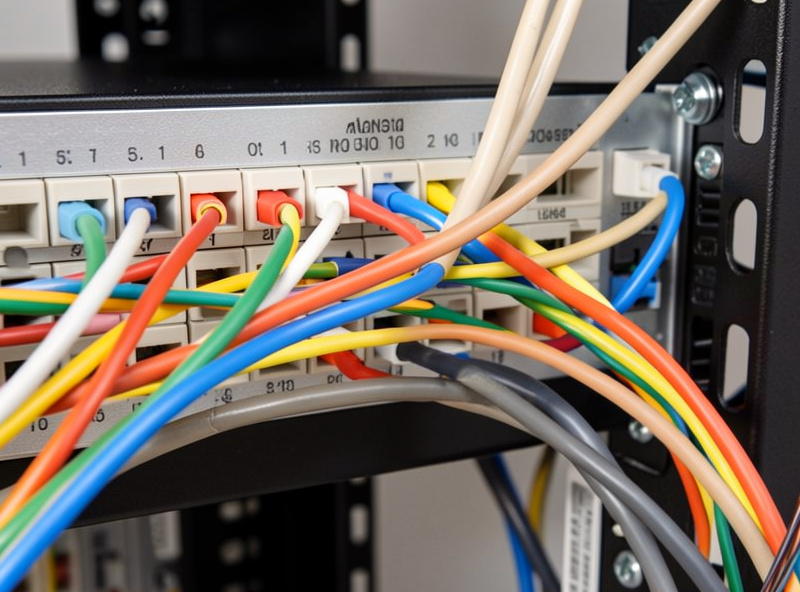
For new in-wall runs in 2026 the answer is solid-copper Cat6 for almost everyone, Cat6a where you know 10G is coming and the run is long. Cat6 carries 1G and 2.5G to the full 100-metre channel, and 10GBASE-T to about 55 metres in good conditions; Cat6a carries 10G to the full 100 metres. Skip Cat5e for new installs and never buy copper-clad aluminium (CCA).
The cable decision is where most home installs go wrong, usually by over-buying or buying the wrong thing entirely. Here is how I actually think about it, and I’ve pulled all of these:
- Cat5e — 100 MHz, gigabit to 100 m, and 2.5GBASE-T works on it fine in practice. Genuinely adequate for most homes, but if you’re already opening walls, the marginal cost of Cat6 is small enough that I don’t pull new Cat5e anymore.
- Cat6 — 250 MHz, my default for in-wall residential. Full-speed 1G/2.5G/5G to 100 m, 10G to ~55 m (shorter if you’ve got a bundle of them packed together, thanks to alien crosstalk). For a normal house where runs are 20–40 m, Cat6 will do 10G on every realistic drop.
- Cat6a — 500 MHz, 10G to the full 100 m. Thicker, stiffer, bigger bend radius, often shielded (F/UTP or S/FTP), and meaningfully harder to terminate into keystones. I pull it for backbone runs between floors and to the rack, not to every wall plate.
- Cat7 / Cat8 — Cat8 is a real 25/40G standard but only to 30 m and it’s overkill and a termination headache for a house. Cat7 uses non-standard connectors (GG45/TERA) nobody actually deploys at home. Ignore both as marketing for residential use.
The one rule with no exceptions: solid copper, not CCA. Copper-clad aluminium is cheaper, fails the standard, has higher resistance (so it droops on long PoE runs and can overheat), and snaps when you flex it. It’s the single most common way people sabotage a run they’ll never want to pull again. I go deeper on the trade-off in the Cat6 vs Cat6a for in-wall runs breakdown.
Jacket ratings: the part that’s actually code, not preference
The jacket rating decides where a cable is legally and safely allowed to run. In-wall vertical runs need riser-rated (CMR) cable at minimum; any cable in an air-handling plenum space needs plenum-rated (CMP). General-purpose CM and the thin patch cable you buy in bags are not rated for in-wall use — pulling them through walls is a real fire-code problem, not a nitpick.
This trips up a lot of homelabbers because the cheap box of cable on the marketplace is usually CM or even unrated, and it’ll happily run gigabit. The issue isn’t performance, it’s fire behaviour. CMR (riser) resists carrying flame vertically between floors; CMP (plenum) has a low-smoke jacket for spaces that share air with your HVAC return. For a normal stud-wall house, CMR is the sane default for everything in the walls. If your install runs cable through a dropped ceiling that’s used as an HVAC return plenum, that segment needs CMP. I keep a spool of CMR Cat6 for the house and don’t overthink it beyond that — but I do refuse to run patch cable inside walls, ever.
The 100-metre rule and why your runs are shorter than you think
The TIA standard gives you a 100-metre channel: a 90-metre permanent link (wall-plate to patch-panel) plus 10 metres of patch cords on each end combined. Go past it and you don’t get a slow link — you get an unreliable one that negotiates down or drops under load. Plan every run to land well inside 90 metres of actual cable, not straight-line distance.
The mistake here is measuring with your eyes. The cable doesn’t go in a straight line — it goes up the wall, across the joists or through the attic, down another wall, with service loops at both ends. A drop that looks like 15 metres across the house is routinely 30–40 metres of actual cable. That’s still fine for Cat6 at any speed. But the run to the far corner of a detached garage can quietly blow past 90 metres, and that’s exactly the run where you’ll later want 10G and discover it won’t certify. When a run is genuinely long or goes building-to-building, that’s the moment to stop fighting copper and pull fibre instead — it ignores distance and electrically isolates the two ends, which also kills ground-loop and lightning-surge problems between buildings.
Termination: keystones, patch panels, and the half-inch rule
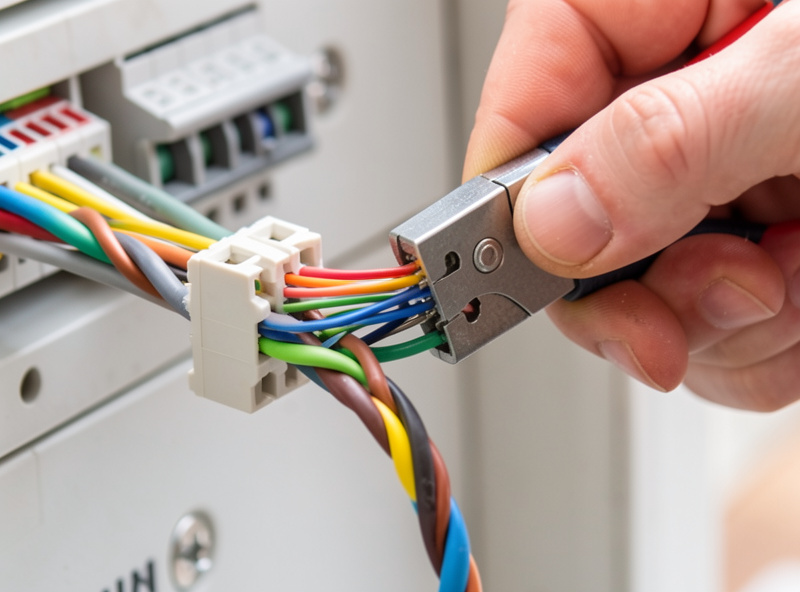
Every permanent run terminates twice: a keystone jack at the wall plate and a patch panel in the rack. The single biggest workmanship rule is untwisting no more than 13 mm (half an inch) of each pair at the punch-down — the twist is what cancels crosstalk, and an inch of untwisted pair at every jack is how Cat6 runs fail certification at 10G while passing at gigabit.
I land everything on a patch panel. Not because it’s tidy (it is) but because it gives you one fixed, labelled, testable point where every run in the house terminates, and it means you patch into switches with short, replaceable cords instead of crimping RJ45 plugs onto solid-core in-wall cable — which is itself a bad idea, since solid conductors are made to be punched down, not crimped into the displacement contacts of a field plug. Keystone-style feed-through panels are the easiest to live with: you punch each run into its own keystone, then snap the keystones into the panel, so a single bad termination is a 30-second fix instead of a re-punch of a fixed panel. The full process — tools, the T568B pinout, panel layout — is in the keystone and patch panel installation guide.
One standard, picked once, used everywhere: T568B. A and B are electrically identical, but mixing them within a run gives you a crossover by accident. Pick B (the de facto residential default in most of the world), put a label on the panel reminding future-you, and never deviate. Consistency here is the whole game.
Structured wiring: the home-run topology
A structured home network is wired as a star: every drop in the house runs back, unbroken, to one central point — the patch panel in your rack. No daisy-chaining, no splices, no mid-wall junctions. One run, one device, terminated at both ends. It’s more cable, but it’s the only topology that’s testable, fault-isolatable, and future-proof.
This is the architecture decision that everything else hangs off, and it’s worth being dogmatic about it. When a drop misbehaves, a home-run star lets you test exactly that one cable end-to-end and swap exactly that one patch cord — nothing else is in the path. Daisy-chained or spliced runs turn every fault into a treasure hunt. I run two or three drops to every location I care about (desk, TV, AP mounting point) precisely because pulling a spare during the install costs almost nothing and pulling one later costs a wall. The full layout philosophy — where to put the panel, how many drops per room, how to handle a multi-floor home — is the structured home network wiring guide. If you’re segmenting the network the way I do, structured wiring is also what lets you map physical drops to VLANs cleanly at the switch, which ties straight into the 7-zone VLAN setup I run.
The rack: where it all lands
Even a small home network earns a rack the moment you have a patch panel, a switch, and anything that needs cooling or a UPS. It doesn’t need to be a 42U datacenter cabinet — a 6U–12U wall-mount or a short open-frame rack holds the patch panel, switch, firewall, ONT, and a UPS with room to grow, and it turns the “pile of gear on a shelf” into something serviceable.
The rack is where cabling stops being about pulling cable and starts being about living with it. Mine is a modest wall-mounted frame: patch panel at the top, switch directly under it so patch cords are short, the OPNsense box and the ONT below, and the UPS at the bottom because it’s heavy. The ordering matters — panel above switch means your patch cords are 30 cm, not 1 m, which is the difference between a clean front and a hairball. I size the UPS to ride out the brief outages that otherwise reboot the whole house’s network; the UPS sizing guide walks through runtime maths. The full physical build — rack sizing, mounting, power, cooling, what order to stack things — is the home network rack setup guide, and once it’s populated, keeping it sane long-term is the cable management problem.
Comparison: cable and media choices at a glance
| Media | Max speed / distance | Bandwidth | Best home use | Termination difficulty |
|---|---|---|---|---|
| Cat5e | 1G to 100 m (2.5G works) | 100 MHz | Existing runs; budget drops | Easy |
| Cat6 | 10G to ~55 m; 2.5G/5G to 100 m | 250 MHz | Default in-wall residential | Easy–moderate |
| Cat6a | 10G to 100 m | 500 MHz | Backbone & long 10G runs | Moderate–hard (stiff) |
| Cat8 | 25/40G to 30 m | 2000 MHz | Rare; short rack links only | Hard |
| OM4 multimode fibre | 10G to 300+ m | n/a (optical) | Long runs; building-to-building | Pre-terminated easiest |
| OS2 singlemode fibre | 10/40/100G to km | n/a (optical) | Future-proof backbone | Pre-terminated easiest |
Fibre at home: when copper stops being the answer
Pull fibre when a run exceeds copper’s comfortable distance, crosses between buildings, or needs to carry more than 10G without re-cabling later. Fibre carries no current, so it’s immune to electrical interference and breaks ground loops and lightning paths between buildings — which is exactly why I’d run it to a detached garage or workshop rather than copper.
Fibre has a reputation for being exotic that it no longer deserves. Pre-terminated patch cables and cheap SFP/SFP+ modules mean you can run 10G over fibre between two switches for not much more than Cat6a, and OS2 singlemode is now cheap enough that I’d default to it for any new backbone run for the headroom alone — the same glass that does 10G today does 40G and 100G tomorrow with only a module swap. The cases where it genuinely wins at home are distance and isolation, not raw speed. Full detail — multimode vs singlemode, connector types, whether to attempt field termination — is the fibre runs for a home network guide, and there’s an honest copper-vs-fibre comparison in the 10G switch guide too.
Test everything, then label everything
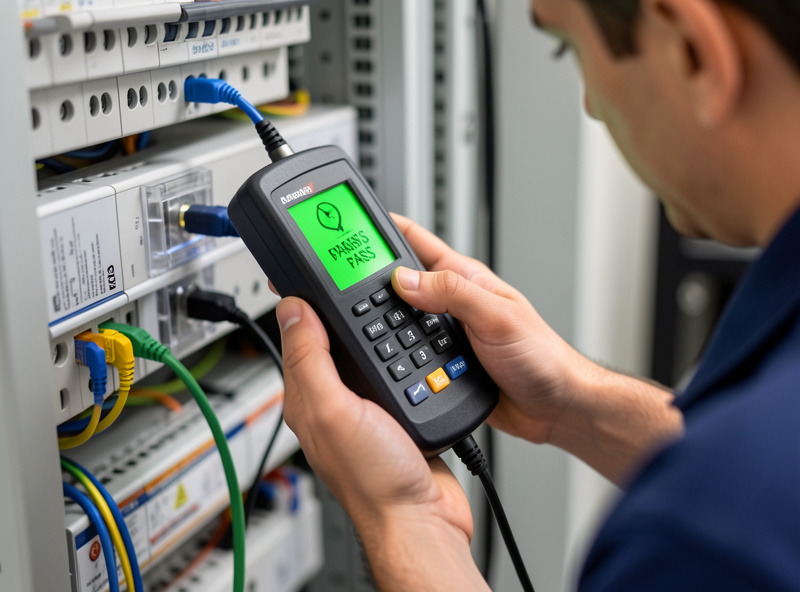
Every run gets tested before you close the wall and label both ends. A basic wiremap tester (under $40) catches the faults that actually happen — opens, shorts, swapped pairs, split pairs — and proves the eight conductors land on the right pins at both ends. Certification to a TIA frequency sweep is a separate, expensive tier most homes don’t need.
The discipline that separates a network you trust from one you fight is testing as you go, not at the end. I wiremap every run the moment it’s terminated, before the drywall goes back, because a re-punch is free with the wall open and a nightmare once it’s closed. For a home, a wiremap plus a basic qualifier (does this link actually pass gigabit/2.5G traffic?) is plenty — you don’t need a $4,000 Fluke certifier unless you’re billing a client. Know the difference between a verifier (wiremap), a qualifier (will it pass this speed?), and a certifier (does it meet the TIA standard to a frequency sweep?); the cable testing and certification guide covers which tier you actually need and how to read the results. And label both ends — panel port number on the panel, matching number on the wall plate. Future-you, tracing a dead drop at 11 p.m., will be grateful.
Planning the install: a realistic weekend plan
A whole-house cabling job is a weekend, not an afternoon, and the order matters: plan the drops first, pull all the cable before you terminate anything, then terminate the panel end, then the wall ends, then test every run. Doing it in that order means you’re never up a ladder twice for the same drop, and you find pull problems before you’ve committed to terminations.
The way I’d approach a fresh install: start with a floor plan and mark every place you might ever want a wired device — desks, TVs, AP ceiling mounts, cameras, the rack. Then double the count at the locations you care about, because a second drop costs you a few metres of cable today and a torn-open wall tomorrow. Budget-wise, the cable itself is the cheap part — a 305 m box of solid CMR Cat6 is modest money; the costs that add up are the tools (a decent punch-down and keystone tool kit), the keystones, the patch panel, and a wiremap tester you’ll use on every run. As an Amazon Associate I earn from qualifying purchases.
Pull tension is the one mechanical number worth respecting: don’t exceed roughly 110 newtons (about 25 lbf) dragging UTP through walls, and never yank it around a sharp corner — a kinked or over-stretched cable deforms the pair geometry permanently and you’ve built a fault you can’t see. Leave a service loop of a metre or so at each end so you can re-terminate without re-pulling. None of this is hard; it’s just sequencing and patience, and it’s the difference between a network you forget about and one you keep apologising for. If you’ve never built the active side, the broader homelab build guide and the DIY router hardware guide cover what hangs off the cabling once it’s in.
How cabling ties into the rest of the network
Good cabling is the enabler, not the goal. Once the physical layer is solid and tested, the interesting work begins: trunking VLANs over those runs on a managed switch, putting your NAS on its own segment, feeding PoE access points over the same Cat6 you pulled, and wiring back your Wi-Fi access points so mesh becomes a coverage tool rather than a crutch. Every one of those depends on the cable underneath carrying clean, full-rate signal — which is why I treat cabling as the foundation the entire homelab stands on, and why I’m willing to spend a weekend pulling it properly. If you’re also hardening the network, the physical map you create here is what makes segmentation and firewall rules tractable instead of guesswork.
Frequently Asked Questions
Should I use Cat6 or Cat6a for in-wall home runs?
Cat6 for almost everyone: it carries 1G/2.5G/5G to the full 100 metres and 10G to about 55 metres, which covers nearly every realistic home run. Pull Cat6a only on long backbone runs where you need certified 10G past 55 metres. Cat6a is thicker, stiffer and harder to terminate.
How long can a home network cable run be?
The TIA channel limit is 100 metres total: a 90-metre permanent in-wall link plus up to 10 metres of patch cords combined. Plan runs to land inside 90 metres of actual cable, not straight-line distance, because the cable’s real path up walls and through joists is far longer than it looks.
Can I run Ethernet cable inside the walls of my house?
Yes, but only with the right jacket rating. In-wall vertical runs need riser-rated (CMR) cable at minimum, and any cable in an HVAC air-handling plenum needs plenum-rated (CMP). The thin patch cable sold in bags is not rated for in-wall use and is a genuine fire-code problem.
Do I need a patch panel for a home network?
Yes, the moment you have more than a couple of permanent runs. A patch panel gives you one fixed, labelled, testable point where every in-wall run terminates, lets you patch into switches with short replaceable cords, and avoids crimping field plugs onto solid-core cable, which is unreliable.
Is copper-clad aluminium (CCA) cable safe to use?
No. CCA fails the Ethernet standard, has higher resistance that causes voltage drop and heat on PoE runs, and is brittle enough to snap when flexed. Always buy solid pure-copper cable for in-wall runs. The small saving on CCA is not worth re-pulling a cable you never wanted to touch again.
When should I use fibre instead of copper at home?
Use fibre when a run exceeds copper’s comfortable distance, crosses between separate buildings, or needs to carry more than 10G without re-cabling later. Fibre carries no current, so it is immune to interference and breaks ground loops and lightning paths between buildings, which copper cannot do.
Do I need an expensive certifier to test home cabling?
No. A basic wiremap tester under $40 catches the faults that actually happen: opens, shorts, swapped and split pairs. For a home, a wiremap plus a simple speed qualifier is enough. A full TIA frequency-sweep certifier costs thousands and is only worth it if you are billing a client.
Related Guides
- Structured Home Network Wiring: The Home-Run Star Layout
- Cat6 vs Cat6a for In-Wall Runs: Which to Pull
- Keystone and Patch Panel Installation Guide
- Home Network Rack Setup Guide
- Network Cable Management Tips
- Fibre Runs for a Home Network
- Testing and Certifying Network Cables