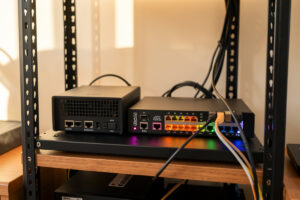
Home network intrusion detection means putting a sensor inline with your traffic that inspects packets against threat signatures and tells you when something on your network is talking to a command-and-control host, scanning your subnets, or exfiltrating data. In my setup it runs on the OPNsense firewall itself, and on a busy evening it logs a few hundred alerts — of which maybe three matter.
That last number is the whole story of running an IDS at home: the tool is easy to install and miserable to live with until you tune it. This guide is the map for the entire cluster — what an IDS actually does, where the sensor belongs on a segmented network, which engine to run, when to let it block traffic, and how to turn a wall of alerts into something you actually read. I run all of this on a real Proxmox-backed homelab with VLAN-segmented hobbies, so the advice here is right-sized for a home rack, not a pretend datacenter.
IDS vs IPS: detection, prevention, and why the difference bites
An IDS (intrusion detection system) watches traffic and raises an alert; an IPS (intrusion prevention system) is the same engine with the authority to drop the packet. On a home firewall they are the same software in two modes — flip a checkbox and Suricata goes from logging a hit to killing the flow. The decision that matters is not which to install, it’s which mode to trust on which interface.
Detection is safe: a false positive costs you a log line. Prevention is not: a false positive in IPS mode drops a legitimate connection, and the first time Suricata decides your smart TV’s firmware update is “malware” and blocks it, the whole house notices. The instinct that took me years to internalize is to run detection everywhere first, watch for a couple of weeks, and only promote a rule category to blocking once I’ve seen it not lie to me. I cover the full tradeoff in Suricata vs Snort for a home network, but the headline is that IPS mode is a privilege a rule earns, not a default you flip on day one.
Where the sensor belongs on a segmented network
The single most consequential decision is where the IDS inspects. Put the sensor on the WAN interface and you see everything arriving from the internet — including the constant background scan noise that never makes it past your firewall’s default-deny rules anyway. Put it on the LAN side (or per-VLAN) and you see what your own devices are actually doing, which is where the interesting findings live: an IoT bulb beaconing to a host in another country, a guest laptop running a port scan.
In my setup the firewall already segments everything — MANAGEMENT, LAN, WORK, KIDS, GUEST, IOT, and a LAB/DMZ zone, each a separate trust boundary with default-deny inter-VLAN rules. The IDS rides on the LAN-facing interfaces because that’s where post-firewall traffic is meaningful. Inspecting the WAN mostly fills your logs with drive-by scans your VLAN firewall rules already blocked. If you haven’t segmented yet, do that first — an IDS on a flat network tells you something is wrong but can’t tell you which trust zone it came from. The home network VLAN guide and network segmentation walkthrough are the prerequisites that make IDS output legible.
One hard limit worth stating plainly: a software IDS on the firewall inspects traffic that crosses the firewall. Two devices on the same VLAN talking to each other never hit the firewall, so the IDS never sees it. Catching intra-VLAN traffic needs a SPAN/mirror port on a managed switch feeding a dedicated sensor — a homelab-scale project I treat as optional, covered in network traffic analysis in a homelab.
The engines you’ll actually meet: Suricata, Snort, Zeek
Three names cover almost every home IDS. Suricata and Snort are signature engines — they match packets against rule sets and fire named alerts. Zeek (formerly Bro) is different: it doesn’t hunt signatures, it writes a structured log of every connection, DNS query, and TLS handshake, which you analyze after the fact. Most home labs run a signature engine for alerting and, if they get serious, add Zeek for the forensic trail.
| Engine | Type | Best home role | Multithreaded | Runs on pfSense/OPNsense |
|---|---|---|---|---|
| Suricata | Signature IDS/IPS | Primary detection + optional blocking | Yes | Both (package) |
| Snort 3 | Signature IDS/IPS | Detection if you prefer its rule ecosystem | Yes (Snort 3) | Both (package) |
| Zeek | Network analysis / metadata logging | Forensics, traffic baselining | Yes | Add-on / separate host |
| pfBlockerNG | DNS & IP reputation filter | Block-by-list, not packet inspection | n/a | pfSense only |
For a home firewall I run Suricata as the default. It’s multithreaded (which matters when you ask one box to route, run a VPN, and inspect at gigabit), it eats the same Emerging Threats rule set Snort can use, and it’s a first-class package on both OPNsense and pfSense. Snort 3 closed most of the old single-thread gap and is a perfectly good choice if you like its ruleset workflow — the head-to-head comparison goes deeper than the table. The one engine I’d steer a beginner away from making their first project is Zeek; it’s magnificent and it answers questions a signature engine can’t, but it gives you data to interpret, not alerts to react to.
DNS and IP filtering is not intrusion detection
This trips up almost everyone starting out, so it’s worth being blunt: pfBlockerNG and DNS blockers like Pi-hole are not IDS tools and don’t replace one. pfBlockerNG blocks connections to known-bad domains and IP ranges using reputation feeds — it’s a bouncer with a list of banned names. Suricata reads the actual contents of the packets that get through and recognizes attack behavior — an exploit pattern, a known malware handshake — even to an IP that isn’t on anyone’s blocklist yet.
They are complementary layers, not competitors. In my stack pfBlockerNG kills the obvious junk cheaply at the DNS and IP layer so Suricata isn’t wasting cycles inspecting traffic that should never have left the building, and Suricata catches the novel or in-the-clear nasty that no blocklist knows about. Running both is the point. If you only have the patience for one, a DNS/IP filter is the higher-value, lower-maintenance starting layer — but call it what it is. The full breakdown is in pfBlockerNG vs Suricata.
Turning alerts into something you actually read
An IDS that nobody monitors is a smoke detector with the battery out. The detection is the easy 20%; the monitoring layer is the 80% that decides whether the thing is useful. Out of the box Suricata writes to its own log and a built-in alerts tab, which is fine for a first look and useless as a habit — nobody logs into the firewall every morning to scroll a raw alert table.
What works at home is a small pipeline: let Suricata write structured EVE JSON, ship it somewhere you’ll actually look, and put a dashboard in front of it. I lean on the OPNsense dashboards plus ntopng for live traffic analysis and tie the whole picture together with my broader home network monitoring stack — Grafana panels, not an enterprise SIEM. The skill that makes any of it pay off is being able to read an alert and decide in ten seconds whether it’s noise or a problem, which is its own learned thing covered in reading IDS logs for beginners. Add CrowdSec if you want community threat intelligence feeding the same firewall, and the detection layer starts to feel less like a fire hose and more like a feed.
A realistic home IDS architecture
Here is the shape I actually run, and it’s deliberately unglamorous. The firewall is OPNsense on a fanless multi-NIC x86 appliance — an IDS doubles a firewall’s CPU appetite, so this is the one place I don’t cheap out on hardware. As an Amazon Associate I earn from qualifying purchases. If you’re sizing a box specifically to run Suricata at gigabit, look at a fanless quad-i226 firewall mini PC with at least 8 GB of RAM and four real cores; underpowered hardware is the most common reason a home IDS gets switched off.
Suricata runs on the firewall in IDS (detection) mode on the LAN-side interfaces, scoped so each VLAN’s traffic is inspected with the rule categories that fit it — the IOT segment gets tight rules because those devices should never do anything surprising, while the LAB/DMZ zone gets looser ones because experimenting there is the point. The HOME_NET variable is set to my actual internal ranges so the engine knows inside from outside. pfBlockerNG-style reputation filtering and DNS blocking sit in front of it, the management interface lives on its own locked-down VLAN, and a UPS keeps the core gear up so the sensor doesn’t miss the exact moment something interesting happens during a brownout. None of this is enterprise gear — it’s a home rack with the trust boundaries drawn deliberately, the same instinct that made me put the hydro lab, the workshop sensors, the kids’ consoles, and the lab on four different VLANs in the first place.
Tuning is the entire game
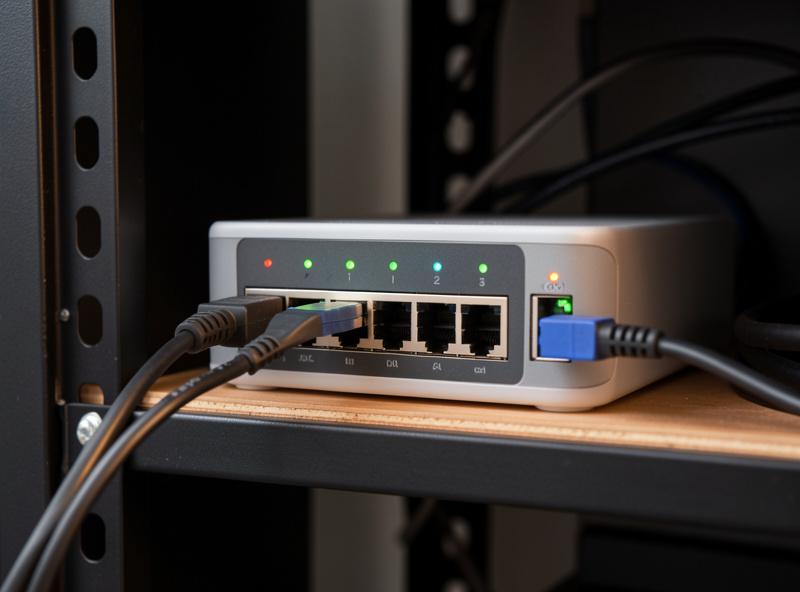
Every home IDS story ends the same way: it worked, it screamed, the owner stopped reading it. The fix is tuning, and it’s not optional — it’s 90% of running an IDS well. Tuning means setting HOME_NET correctly so internal traffic is classified right, disabling rule categories that don’t apply to a home (you do not need the rules for industrial SCADA protocols or enterprise mail servers you don’t run), and suppressing the specific signatures that fire on your normal devices — the IoT chatter, the gaming console’s NAT traversal, the printer’s mDNS.
The goal is a quiet console where every alert that fires is worth a second look. A tuned home IDS might log a dozen alerts a day instead of a thousand, and that’s the difference between a tool you use and a tool you ignore. I walk through the whole process — ruleset selection, suppression lists, threshold tuning — in tuning IDS rules for home networks. Do not skip it; an untuned IDS is worse than no IDS because it teaches you to ignore the one alert that mattered.
Honeypots: the other half of detection
Signature detection tells you when known-bad traffic crosses your network. A honeypot answers a different question: is anything already inside, poking at things it shouldn’t? A honeypot is a deliberately fake service — a fake SSH server, a fake SMB share — sitting on a VLAN where nothing legitimate should ever connect to it. The moment something touches it, you have a high-confidence signal with almost zero false positives, because there is no innocent reason to knock on a door that doesn’t lead anywhere.
It’s the highest signal-to-noise detector you can run at home and it pairs beautifully with VLAN segmentation: drop a honeypot on your IOT or GUEST segment and any connection to it means a device on that segment is doing reconnaissance. I run a low-interaction honeypot on the lab segment for exactly this reason, and the full build — what to deploy, where to place it, how to alert on it — is in honeypot setup at home.
What an IDS can’t see: the encryption problem
Be honest with yourself about the limits before you trust the green light. The uncomfortable truth of running a signature IDS in 2026 is that the overwhelming majority of traffic is encrypted, and Suricata can’t read inside a TLS session it can’t decrypt. It sees that your laptop opened an HTTPS connection to some IP, it can read the certificate and the SNI hostname during the handshake, but the payload — the part where the actual attack or exfiltration would live — is ciphertext.
That changes what an IDS is good for. It is excellent at catching the things that still happen in the clear or that reveal themselves in metadata: plaintext exploit attempts, malware that uses unencrypted protocols, port scans, DNS-based command-and-control, connections to known-bad infrastructure, and the shape of suspicious traffic (a fridge that suddenly opens an SSH session, a bulb beaconing every thirty seconds to the same foreign host). It is much weaker against a competent attacker tunneling everything through TLS to a clean IP. This is exactly why detection is a layered game and not a single magic box — the IDS, the DNS filter, the reputation feeds, the honeypot, and your firewall logs each see a different slice, and an attacker has to beat all of them. Anyone selling you a single appliance that “stops all threats” is selling the same security theater I associate with consumer mesh routers advertising “military-grade” protection.
The order I’d build it in
If you’re standing at the start of this and wondering what to do first, here’s the sequence I’d follow — each step makes the next one more useful, and skipping ahead is how people end up with an unreadable alert fire hose.
- Segment first. An IDS on a flat network is half-blind. Get your VLANs and default-deny firewall rules in place so alerts carry the context of which zone they came from. Guest isolation and caging IoT devices on their own segment are the highest-leverage moves here.
- Add cheap filtering. Stand up DNS and IP reputation blocking — pfBlockerNG on pfSense or a DNS sinkhole — so the obvious garbage never reaches the inspection layer.
- Install the IDS in detection mode. Put Suricata on the firewall and let it watch without blocking. Installing it on pfSense takes an evening; getting the interface and HOME_NET right takes a little care.
- Tune relentlessly for two weeks. This is the real work. Kill the rule categories that don’t apply, suppress the signatures your own devices trip, and get to a quiet console. The tuning guide is the one to actually follow.
- Build the monitoring habit. Wire alerts into a dashboard you’ll glance at, and practice reading the logs until triage is reflexive.
- Promote to IPS selectively, add a honeypot. Once a category has proven it doesn’t lie, let it block. Then drop a honeypot on a quiet segment for near-zero-false-positive coverage of the threats signatures miss.
Done in that order, intrusion detection stops being a noisy gadget and becomes a genuine sense for what’s happening on your own wire. Done out of order, it’s the project that sits half-configured in the firewall until you forget it’s there.
Frequently Asked Questions
Do I really need an IDS on a home network?
Need is strong. If you run good VLAN segmentation, default-deny firewall rules, and DNS/IP filtering, an IDS is the next layer that adds visibility into what your own devices are doing rather than just blocking known-bad. It is most worth running once your network is segmented and you want detection, not just prevention.
What is the difference between an IDS and an IPS?
An IDS detects and alerts on suspicious traffic but lets it through. An IPS uses the same engine but actively drops the offending packets. On a home firewall they are the same software in two modes. Run detection first for weeks, then promote specific rule categories to blocking once you trust they will not block legitimate traffic.
Will running Suricata slow down my internet?
It can if your firewall hardware is underpowered. Inspecting traffic at line rate roughly doubles a firewall’s CPU load. On a multi-core x86 appliance with adequate RAM, gigabit inspection is comfortable. On a low-end single-board device, expect throughput to drop. Match the hardware to your line speed before enabling IPS mode.
Is pfBlockerNG an intrusion detection system?
No. pfBlockerNG blocks connections to known-bad domains and IP ranges using reputation feeds. It does not inspect packet contents or recognize attack behavior. Suricata reads the actual packets and detects exploits and malware patterns even to addresses no blocklist knows. They are complementary layers, not substitutes.
Where should the IDS sensor be placed?
On the LAN-facing interfaces, ideally per VLAN, so you see what your own devices are doing after the firewall has filtered inbound junk. Placing it only on the WAN fills logs with internet scan noise your firewall already drops. Note a software IDS on the firewall cannot see traffic between two devices on the same VLAN.
Why does my IDS generate so many alerts?
Out of the box it runs broad rule sets against everything, including normal home device chatter. Tuning fixes this: set HOME_NET to your internal ranges, disable rule categories that do not apply to a home, and suppress signatures that fire on your known-good devices. A tuned home IDS logs a dozen meaningful alerts a day instead of a thousand.
Related Guides in This Cluster
- Suricata vs Snort for a Home Network — which engine to run and why
- Installing Suricata on pfSense — the focused install walkthrough
- Tuning IDS Rules for Home Networks — the part that makes it usable
- Network Traffic Analysis in a Homelab — SPAN ports, Zeek, and seeing intra-VLAN traffic
- pfBlockerNG vs Suricata — how the filtering and detection layers differ
- Reading IDS Logs for Beginners — triaging alerts in ten seconds
- Honeypot Setup at Home — the highest signal-to-noise detector you can run
- Home Network Security Hardening — the firewall-and-VLAN foundation underneath all of this