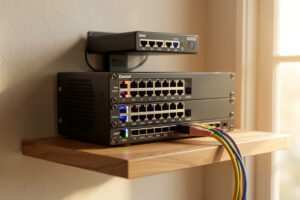
If a port forward you configured perfectly still refuses to open from the outside, the problem is almost never the rule — it is your WAN address. The single fastest test: look at the WAN IP your router holds and compare it to the public IP a site like an “what is my IP” lookup reports. If they match, you are reachable and the fix is local. If your WAN IP starts with 100.64 through 100.127, you are behind carrier-grade NAT (CGNAT) and no port forward will ever work until you change the connection itself.
I run a segmented home network off an OPNsense box on dedicated hardware, with a Proxmox host as the spine and self-hosted services on the LAB/DMZ side that I reach from outside. Getting those reachable means I have fought every one of the three states a home connection can be in — direct public IP, double NAT, and CGNAT — and the diagnosis order below is the one I actually use before I touch a firewall rule. This guide is the map; each branch links out to a focused walkthrough.
The Three Connection States, and Why Only One Lets You Port Forward
Inbound reachability depends entirely on what address sits on your router’s WAN interface. There are three possibilities: a real public IP (you can port forward), a private RFC 1918 address handed down by an ISP box (double NAT — fixable by you), or a shared CGNAT address in 100.64.0.0/10 (carrier-controlled — not fixable locally). Everything else in this guide flows from which of those three you are in.
People conflate double NAT and CGNAT constantly, and the conflation costs hours. Double NAT means there are two routers in your own home each performing NAT — your firewall behind the ISP’s gateway, for instance. You own both boxes, so you can collapse one into bridge mode and the problem disappears. CGNAT means the carrier is doing an extra layer of NAT in their network, sharing one public IPv4 address across dozens or hundreds of subscribers. You do not own that box and cannot open a port on it. The symptom — port forwards that silently fail — looks identical. The cure is completely different. Telling them apart is step one, and I gave it a whole walkthrough: how to tell if you’re behind CGNAT and why your port forwards silently fail.
How to Diagnose Your State in Under Two Minutes
Read your router’s WAN IP, then match it against three address ranges. A WAN IP equal to your public IP means direct — port forwarding works. A WAN IP in 10.0.0.0/8, 172.16.0.0/12, or 192.168.0.0/16 means double NAT. A WAN IP in 100.64.0.0/10 means CGNAT. This single comparison resolves 95% of “my port won’t open” tickets.
Here is the decision tree exactly as I walk it on my own gear. First, on the firewall’s WAN interface, note the address it received from upstream. Second, from any device on the LAN, look up your public IP through an external service. Third, compare:
- WAN IP == public IP — you have a routable public address on the WAN. Port forwarding will work; if a forward fails, the bug is in your rule, your NAT reflection, or the service itself, not the connection. Jump to the testing section below.
- WAN IP is a private RFC 1918 address (10.x, 172.16–31.x, 192.168.x) — there is another router between you and the internet doing NAT. That is double NAT. The clean fix is putting the upstream box into bridge mode so your router gets the public address directly. See what double NAT actually breaks and how to put the ISP box into bridge mode.
- WAN IP is in 100.64.0.0/10 (anything 100.64.x through 100.127.x) — that is the RFC 6598 shared address space reserved for carrier-grade NAT. You are behind CGNAT. No local change opens a port. Your options are getting a real public IP from the ISP, or routing around the problem entirely with an outbound tunnel or overlay.
One trap: you can be in both states at once. An ISP gateway in router mode handing a 192.168 address to your firewall, while the ISP gateway itself sits behind CGNAT, is double NAT stacked on CGNAT. Fixing the bridge mode removes one layer but you are still stuck behind the carrier. Always check the ISP gateway’s own WAN address, not just the one it hands you.
Why ISPs Deploy CGNAT in the First Place
CGNAT exists because the world ran out of IPv4 addresses. There are roughly 4.3 billion IPv4 addresses total and far more devices than that, so carriers share a single public IPv4 across many customers using the 100.64.0.0/10 range defined in RFC 6598. It saves the ISP addresses; it costs you inbound reachability.
This is not malice, it is arithmetic. Every residential customer who used to get a dedicated public IPv4 was burning a scarce resource, and once the regional registries exhausted their free pools, carriers had two cheap ways to keep onboarding subscribers: deploy IPv6 (which fixes this properly) and deploy CGNAT for IPv4 (which papers over it). Most consumer connections now get both — a working IPv6 prefix and a shared, un-forwardable IPv4. That IPv6 prefix is genuinely useful and I cover it as an option below, but it only helps when the thing you are trying to reach from also has IPv6, which on a hotel Wi-Fi or a corporate guest network it often does not.
The practical takeaway: CGNAT is now the default on a large share of fiber, cable, and especially mobile and fixed-wireless connections. If you signed up recently on a budget or “no static IP” plan, assume CGNAT until you have proven otherwise. The ISP rarely advertises it.
The Reachability Toolbox: Five Ways to Get Inbound
Once you know your state, the fix is one of five approaches: fix double NAT with bridge mode, port forward on a real public IP, obtain a public/static IP from the ISP, route around CGNAT with an outbound tunnel (Cloudflare Tunnel, WireGuard to a VPS, an overlay like Tailscale), or expose a single service through a reverse proxy. Each suits a different situation and risk tolerance.
The mental model I use: the cleanest fix is the one that removes the obstacle rather than tunneling past it. If you have double NAT, bridge mode is the right answer — it is free, permanent, and gives you a real public IP to forward on. If you are behind CGNAT, you cannot remove the obstacle, so you tunnel around it. The tunnel methods all share one elegant property: they rely on an outbound connection from your home, which CGNAT permits freely, to a rendezvous point that does have a public address. That is why a $5 VPS or a Cloudflare Tunnel works where a port forward cannot — the home end dials out, so no inbound port is ever needed.
Comparing the Methods
| Method | Works behind CGNAT? | Needs public IP? | Cost | Best for |
|---|---|---|---|---|
| Bridge mode + port forward | No (fixes double NAT only) | Yes (your ISP must give one) | Free | Double-NAT setups with a real public IP upstream |
| Request public/static IP from ISP | Yes (removes CGNAT) | Becomes yes | Free to ~$5–15/mo | Anyone who wants normal port forwarding back |
| Cloudflare Tunnel | Yes | No | Free tier | Web apps and dashboards over HTTPS |
| WireGuard to a VPS | Yes | No (VPS has one) | ~$4–6/mo VPS | Any protocol, full control, game/media servers |
| Overlay (Tailscale/Headscale) | Yes | No | Free tier | Private access for you and trusted devices |
| Reverse proxy on a VPS | Yes | No (VPS has one) | ~$4–6/mo VPS | Public services with a real public IP front |
I run several of these side by side. WireGuard handles my own remote access into the management plane; a reverse proxy fronts the handful of services I expose publicly; and an overlay covers the devices that should reach the lab without exposing anything at all. The depth on each lives in its own guide — start with beating CGNAT without a public IP for the full tunnel-and-overlay breakdown, then Cloudflare Tunnel vs a VPS reverse proxy when you have to pick one.
Fix Number One: Collapse Double NAT With Bridge Mode
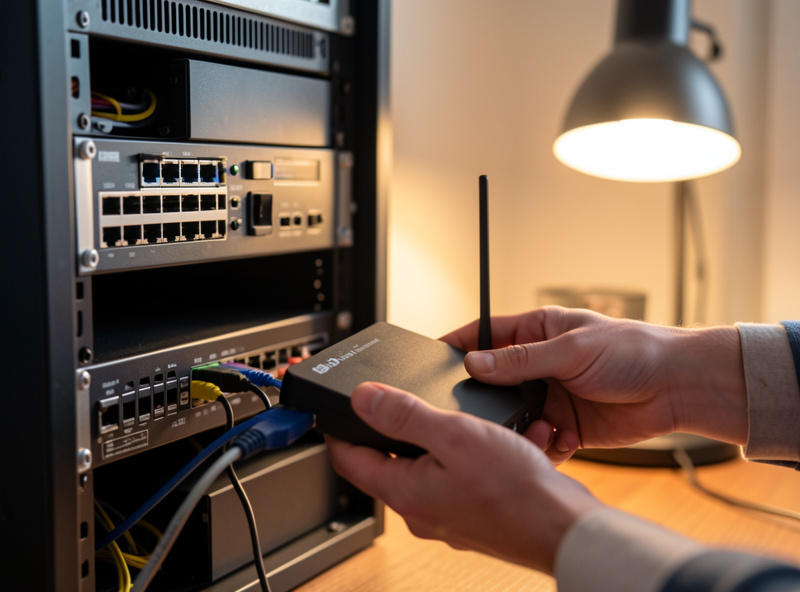
If your firewall’s WAN holds a private address, put the ISP box into bridge mode (sometimes called pass-through or modem mode). This disables the ISP router’s NAT and DHCP so your own router receives the public IP directly. After the change, your WAN IP should match your public IP, and port forwarding works normally — no tunnels required.
Bridge mode is the single highest-value change for anyone running their own router behind an ISP gateway. Double NAT does not break web browsing, so most people never notice it until they try to host something — a game server, a remote-desktop session, a self-hosted app — and the inbound connection dies at the outer NAT. Collapsing the outer layer fixes that and, as a bonus, removes the state-table and throughput limits of the typically weak ISP box. There are real gotchas: some ISP gateways call it “passthrough” and only forward a single MAC, some lock VoIP or IPTV services to the gateway, and a few units hide the setting entirely. I walk the whole process, including the difference between true bridge mode and IP-passthrough, in bridge mode vs passthrough. Just remember: bridge mode only helps double NAT. If the ISP gateway is itself behind CGNAT, bridging it gives you the carrier’s shared 100.64 address, not a public one.
Fix Number Two: Get a Real Public IP From Your ISP
The most direct CGNAT cure is to ask the ISP to move you off it. Many carriers will assign a public dynamic IP, or a static IP for a small monthly fee, on request — sometimes for free if you simply ask support to “remove CGNAT” or “enable a public IP.” A dynamic public IP plus dynamic DNS is enough for most home hosting; a true static IP costs more but never changes.
This is worth trying first because it is often free and it restores normal networking — every port-forward tutorial, every game server guide, every UPnP-dependent app just works again. The catch is that the answer varies wildly by ISP and even by the support agent you reach. Some carriers offer a no-cost opt-out, some charge for a static IP only, and some flatly refuse on residential plans and tell you to upgrade to business service. I lay out the exact phrasing that works, the dynamic-vs-static distinction, dynamic DNS as the cheap middle ground, and the fallbacks when the ISP says no, in how to get a static or public IP from your ISP and the alternatives. If you secure a public IP this way, your port forwards come back to life and you can skip the tunnel section entirely.
Fix Number Three: Route Around CGNAT With an Outbound Tunnel
When the ISP will not budge, you tunnel out instead of forwarding in. Because CGNAT freely allows outbound connections, a daemon on your home network can dial a public rendezvous — a VPS you rent, Cloudflare’s edge, or an overlay coordinator — and inbound traffic rides back down that established connection. This needs zero port forwards and works behind the strictest carrier NAT.
This is the category that actually gets most homelabbers reachable, because it sidesteps the ISP entirely. There are three flavors worth knowing. Cloudflare Tunnel runs a lightweight cloudflared daemon that connects out to Cloudflare; you point a hostname at it and your web services are reachable over HTTPS with no open ports — the free tier covers a lot of home use. WireGuard to a VPS gives you a private encrypted link from home to a cheap cloud box with a public IP; you forward ports on the VPS into the tunnel, which works for any protocol, not just web. An overlay network like Tailscale (or self-hosted Headscale) builds a private mesh between your devices so you reach the lab from your laptop or phone without exposing anything to the public internet at all.
Which one you pick depends on whether the service is public or private, and whether it is web-only or arbitrary traffic. The full comparison — including the Cloudflare ToS limits on proxying large non-HTML files — is in beating CGNAT without a public IP: WireGuard, tunnels, and reverse proxies, and the head-to-head for the two most common public-hosting choices is Cloudflare Tunnel vs a VPS reverse proxy. For the remote-access side specifically, my home VPN and remote access guide, the WireGuard vs OpenVPN comparison, and the Tailscale and Headscale setup go deeper than I can here.
Fix Number Four: Front a Service With a Reverse Proxy
If you want a service to be genuinely public — reachable by anyone, not just your own devices — put a reverse proxy on a machine that has a public IP. The proxy receives connections on the public side and relays them down a tunnel to your home service. On a VPS this pairs naturally with WireGuard; with Cloudflare Tunnel the reverse proxy is effectively Cloudflare’s own edge.
The reverse proxy is also where you terminate TLS, add authentication, and hide your home’s real address from the public. I run Nginx in this role for the services I expose, and the choice between rolling your own on a VPS versus leaning on Cloudflare’s edge comes down to control versus convenience — and, importantly, what you are allowed to serve. If you are still choosing proxy software, my reverse proxy setup guide comparing Nginx Proxy Manager and Traefik covers the home-grade options, and the self-hosting guide ties the whole stack together.
The IPv6 Path: Reachability Without Touching IPv4
If your connection has working IPv6, you may already be reachable on it right now, CGNAT and all. IPv6 gives most home connections globally routable addresses that bypass carrier NAT entirely, so a service bound to its IPv6 address can accept inbound connections directly — you just open the corresponding rule in your firewall. The single limitation is that whoever connects to you also needs IPv6.
This is the cleanest workaround when it applies, because there is no tunnel, no VPS, and no monthly cost — you are using addressing the carrier already handed you. On my network the firewall gets a delegated IPv6 prefix and the internet-facing hosts each take a stable address out of it; a firewall rule allowing the specific port to the specific host is all that stands between “filtered” and “reachable.” The honest caveat is dual-stack reality: a friend on a CGNAT-only mobile carrier, a corporate guest network, or an older home connection may have no IPv6 path to you, and then the connection silently falls back to the un-forwardable IPv4 and fails. So I treat IPv6 as a free bonus layer, not a sole strategy — it covers the growing share of clients that have it while a tunnel covers the rest. Note too that IPv6 firewalling is allow-by-rule the same as IPv4: a global address is publicly routable, so the default-deny posture from the OPNsense firewall rules guide matters even more here than behind NAT.
Mistakes That Waste Hours
Most “I tried everything and it still won’t work” cases come down to a handful of repeat offenders: testing from inside the LAN, forgetting the service is bound to localhost, a firewall rule on the wrong interface, or fixing one NAT layer while a second one survives. Diagnose the connection state first, then verify each link in the chain from the outside in.
Here are the ones that have bitten me or that I see constantly, in the order they tend to fail:
- Testing from your own network. A LAN-side test passes or fails for reasons unrelated to outside reachability — see the NAT reflection trap below. Always test from mobile data or an external checker.
- The service is bound to 127.0.0.1. Plenty of apps listen only on localhost by default. The port forward and firewall can be perfect and the connection still resets because nothing is listening on the LAN-facing address. Confirm the bind address before blaming the network.
- Forwarding to the wrong internal IP, or one that changed. A DHCP lease expiring and moving the server to a new address quietly breaks a static port forward. Use a DHCP reservation for anything you forward to.
- The rule is on the wrong interface or below a block rule. On OPNsense and pfSense, rule order matters and a NAT rule needs the matching firewall pass on the WAN. A forward with no pass rule does nothing.
- Fixing double NAT but ignoring CGNAT underneath. Bridging the ISP box feels like progress, but if the gateway’s own WAN is a 100.64 address you have simply moved the carrier NAT one hop closer. Check the upstream WAN address, not just your own.
- Assuming UPnP did its job. Automatic port mapping fails silently behind CGNAT and on many ISP gateways. Never rely on it for something you need to actually work — set the forward explicitly and verify it.
After You Are Reachable: Test It Properly
Do not trust a port checker that says “open” from inside your own network. A real reachability test comes from outside your LAN — a phone on mobile data, or an external port-scanning service — hitting your public IP on the target port while the service is actually listening. “Open” only means something when the request originated off-network and a real service answered it.
This is where people fool themselves. Browsing to your own public IP from a LAN device can succeed because of NAT reflection (hairpin NAT) while the port is still completely closed to the outside world — or fail even though outside access works, because your router does not support hairpinning. The only honest test loops in from a genuinely external vantage point. I detail the full method — external port checks, the hairpin NAT trap, the difference between “filtered,” “closed,” and “open,” and how to confirm the service itself is bound to the right interface — in testing inbound reachability. Pair it with the home network troubleshooting guide when the failure turns out to be DNS rather than NAT.
Where This Fits in the Rest of the Network
Reachability is one slice of running your own router. Once inbound works, the next questions are how to segment what you expose, how to harden the firewall rules in front of it, and where the exposed service lives on your topology. On my network anything internet-facing sits on the LAB/DMZ VLAN, isolated from the trust LAN by default-deny rules, so a compromised public service cannot pivot into the rest of the house. If you have not built that separation yet, the home network VLAN guide and OPNsense firewall rules are the prerequisites, and the Proxmox homelab setup covers the host those services run on. If you are still picking a firewall platform, start with OPNsense vs pfSense and the beginner’s guide to home routing.
Frequently Asked Questions
How do I know if I’m behind CGNAT or just double NAT?
Compare your router’s WAN IP to your public IP. A WAN IP in 100.64.0.0/10 (100.64.x through 100.127.x) means CGNAT, which you cannot fix locally. A WAN IP that is a private address like 192.168.x or 10.x means double NAT, which you fix with bridge mode. A WAN IP matching your public IP means you are direct.
Can I port forward when I’m behind CGNAT?
No. CGNAT shares one public IPv4 address across many subscribers on the carrier’s equipment, and you cannot open a port on hardware you do not control. You must either get a real public IP from the ISP or route around CGNAT with an outbound tunnel such as Cloudflare Tunnel, WireGuard to a VPS, or an overlay network.
Does bridge mode fix CGNAT?
No. Bridge mode only fixes double NAT by disabling the ISP gateway’s NAT so your router gets the upstream address directly. If that upstream address is itself a CGNAT 100.64 address, bridging just passes the shared carrier address through and you are still un-forwardable.
Is CGNAT a security risk?
CGNAT itself is not a meaningful security upgrade or downgrade for a properly firewalled network. It does hide your devices behind the carrier’s NAT, but a default-deny firewall already does that. Its real effect is on reachability, not security, and it can complicate peer-to-peer apps, gaming, and self-hosting.
Will IPv6 solve my CGNAT problem?
Sometimes. Most CGNAT connections also provide a real IPv6 prefix, and an IPv6-reachable service can be hosted without the carrier NAT in the way. The catch is that the client connecting to you also needs working IPv6, which many public, mobile, and corporate networks still lack, so IPv6 alone is not a complete answer.
What’s the cheapest way to host a home service behind CGNAT?
A free-tier Cloudflare Tunnel for web apps, or a roughly $4 to $6 per month VPS running WireGuard plus a reverse proxy for arbitrary protocols. Both rely on an outbound connection from home, so they work behind the strictest CGNAT without any port forwarding.
Related Guides
- How to Tell If You’re Behind CGNAT and Why Your Port Forwards Silently Fail
- Double NAT: What It Breaks, What It Doesn’t, and When to Care
- Bridge Mode vs Passthrough: Putting Your ISP Box Into the Right Mode
- Beating CGNAT Without a Public IP: WireGuard, Tunnels, and Reverse Proxies
- Cloudflare Tunnel vs a VPS Reverse Proxy for Exposing Home Services
- How to Get a Static or Public IP From Your ISP and the Alternatives
- Testing Inbound Reachability: Port Checks, Hairpin NAT, and What ‘Open’ Really Means